
Images produced by spy agencies of the time truly defined the aesthetic of x-ray photography in Cold Wars, and it is a very wide medium for photographers even today. That’s Why X-Rays are some seriously high-tech stuff and are very reminiscent of the technological generation.
X-Ray film to create their images is used by many large format photographers, and the unique properties of X-Ray film give the images a character that has its own vibe in it.
So, In this method, we are going to create a similar type of X-Ray effect in Photoshop. We also need a picture that will make the effect look more realistic and make it even more special.
Table of Contents
Steps To Make X-Ray Effect:
For this tutorial, I have used this photograph from Pixabay, which has a lot of photographs of freelance photographers for us designers to use. When the effect is complete, the transparencies are going to push the realism of the effect by giving it a ghostly character.
Step 1:
Firstly, we have to import our image on which X-Ray effect in Photoshop will be applied and have your image open inside Photoshop.

Step 2:
Now we have to duplicate the layer. In order to do this, go to the bottom right corner of the screen to the Layers Panel and right-click on the layer named Background. In the menu that pops up, select Duplicate Layer in Photoshop.

You will now have a second layer called Background Copy.

First, we are going to invert the image from positive to negative. This is about 70% of the effect.
Now, with the duplicate layer still selected, we have to go to Image, Then in Adjustment, press Invert.

Or we can simply press Ctrl + I [For Windows] or Cmd + I [For Mac]. Your layer should now be inverted.
Step 3:
The image will be inverted for the X-Ray effect in Photoshop, but it still has some colors but X-Ray images don’t have that colors. So, to make it look closer to an X-ray, we will have to convert it to black and white. To do this, go to the bottom right corner of the Layers Panel and click on the Adjustments icon.
This will bring up the Adjustments menu. In the menu, select Black & White.

The Black & White adjustments layer will now pop up in the Layers Panel and your image will now look like this.
Blue areas appear more black in X-Ray images because X-Ray film compared to other films it is less sensitive to blue light.
Therefore, go to the Black & White adjustments panel above the Layers Panel and lower the Blues saturation in order to darken the skin tones.

At this stage, the image is already really starting to look like a real X-ray Effect. However, it looks more like a film negative than an X-ray. To completely look like an X-Ray effect in Photoshop we have to add some extra filters or effects.
Step 3:
X-Rays have a ghostly quality to them. To achieve this, we are going to create and overlay a blur.
For this, we have to create a merged layer of all layers.
Now, press Ctrl + Alt + Shift + E [For Windows] or Cmd + Option + Shift + E [For Mac]. This will create a new merged layer from the previously selected layers.

Now we create the blur. In the menu, go to Filter > Blur > Gaussian Blur.
In the Gaussian Blur menu, select a radius of your choice.

Now, back on the Layers Panel, you will find the Blend Modes menu.
By default, it is set to Normal. Click on it and change the blend mode to Overlay.

Change the Opacity to around 45%-50%.
Step 4:
Now we have to add some noise to show more realism in the image. Go to the bottom right of the Layers Panel and click on the New Layer icon.

Now in the menu, go to Edit > Fill. This will open the Fill menu.
Change the Contents to 50% Gray and click on OK.

You will now have a completely gray image.
Now, once again in the menu, go to Filter > Noise > Add Noise.
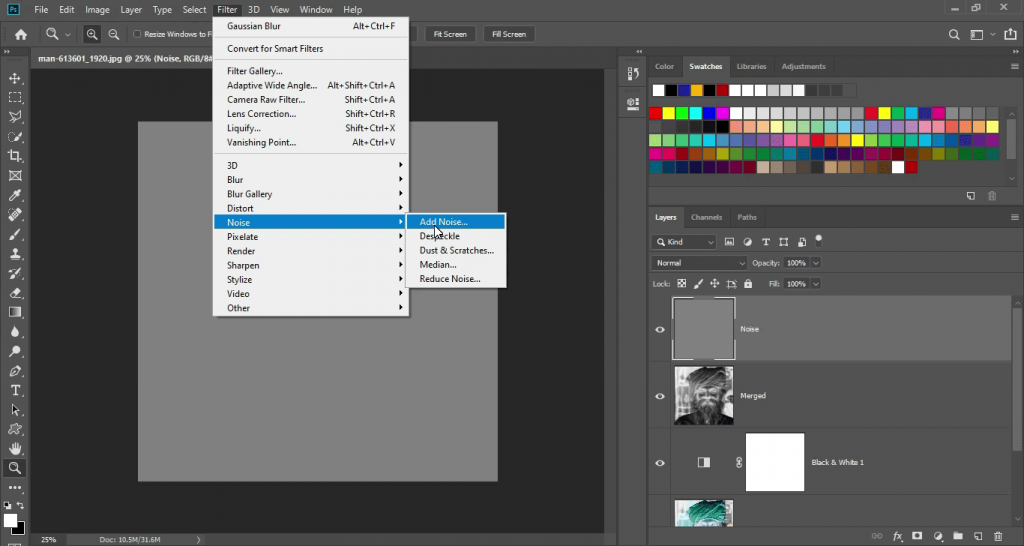
In the Add Noise menu, select a value and make sure to select monochromatic.

Now you will have a gray image of random noise.
Now we must overlay this onto our image. To do that, go to the Layers Panel, and change the blend mode of the noise layer to Overlay.

In addition, change the layer opacity to somewhere between 50%-60%.

Step 5:
For a finishing touch, we have to add some blue filter on it. In the Layers Panel, go to the Adjustment Layers menu and select Photo Filter.
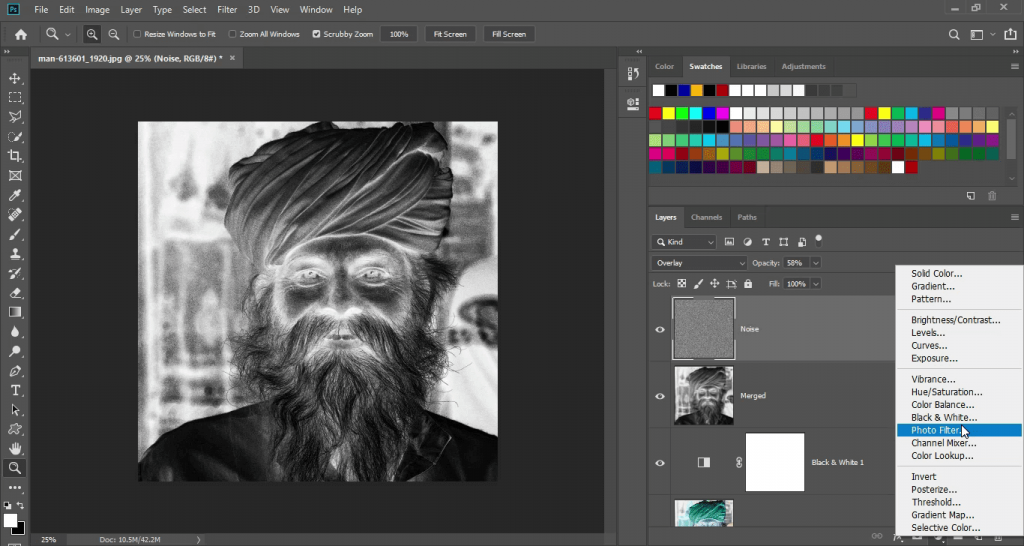
This will create a new adjustment layer.

In the Photo Filter menu, change the Filter to Cold Effect and lower the density. This will create the Cyan tint that is characteristic of X-Ray images.
Conclusion:
We now have a finished X-Ray effect in Photoshop!

Keep Learning:
How To Copy A Layer Mask In Photoshop For Masking Portraits Make Them More Engaging.
Watch Video For More Info:

I’m a Graphic Designer with 5+ years of experience. Specialized in Adobe Photoshop.
Get Info About Any Photoshop Editing, Photoshop Manipulation, Logo Design, Flyers, Business Card, Cartoon Portrait and any type of work-related to Graphic Design and Photoshop Editing.


