
Twitter is a powerful social media tool that can be used to build relationships with customers and clients, promote brand awareness, and share news and information. And also it is a great way to share your thoughts and images with the world, and having an eye-catching banner can really help your profile stand out.
In this tutorial, we’ll show you How to Make a Twitter Banner in Photoshop using some simple techniques. So if you’re looking to give your account a bit of a makeover, read on!
Related: How to Design a Billboard in Photoshop (Step-By-Step).
Related: How to Make a Business Card in Photoshop (Premium Quality).
Table of Contents
Creating a New Document For Twitter Banner
The first step in creating a Twitter Banner in Photoshop is to create a Twitter design document. You can start designing your own Twitter banner using the instructions below.
You can develop your designing skills overtime to produce more complex and gorgeous designs.
After launching Photoshop, we must create a New Document and then enter the dimensions and data for a billboard.
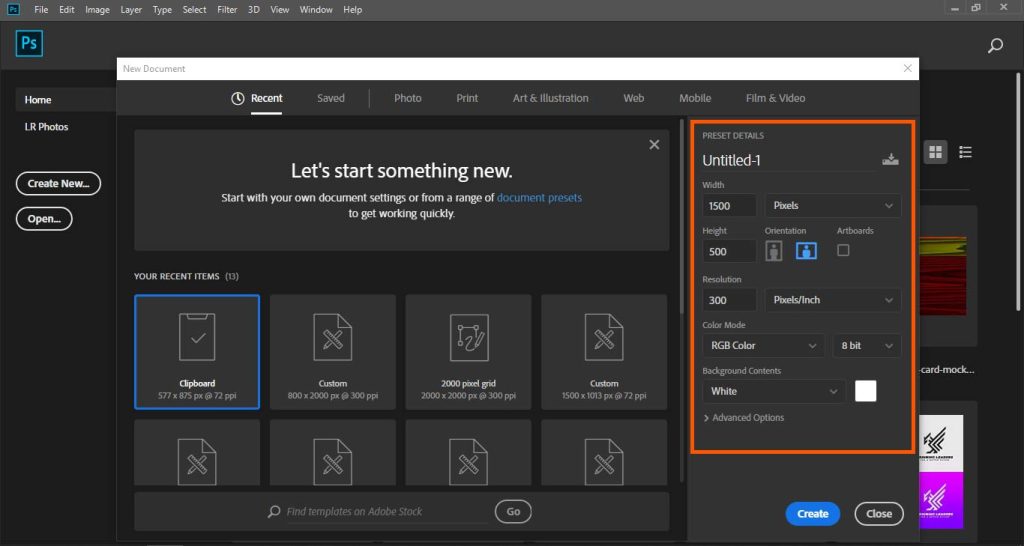
In Photoshop, go to File > New. A window appears, allowing you to name the document as well as change its dimensions, resolution, and color mode. Name the document of your choice. Set the file to the following dimensions:
- Width to 1500 pixels
- Height to 500 pixels
- Orientation to Landscape
- Resolution to 300 dpi
- Colour Mode to RGB
Then click Create.
This is the actual standard size of a Twitter Banner Design.
How to Design a Twitter Banner in Photoshop
Adding Images for Twitter Banner Design:
I’m going to make a Twitter banner for the blog for this design, First of all, we have to add a picture for the background.
I’m using a picture of these pencils and yellow background for this banner but you can choose whatever you want according to your Banner.
You can download Free Stock Photos from Unsplash.
Now after adding the picture adjust its size & position according to your preference.

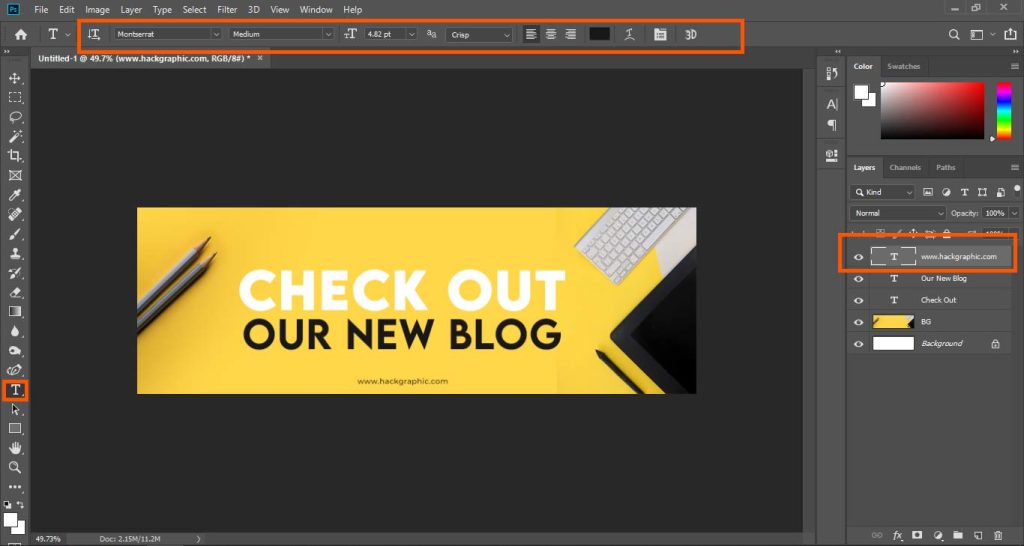
Adding Texts for Twitter Banner Design:
Then the second thing is to add text to our banner.
I’m using the two main texts as “Check Out”, and “Our New Blog”. Then we’ll arrange that text in the center of the banner to keep it simple & clean.
Make some text smaller & bigger to get some hierarchy in the design. I’m making the bottom one smaller to make their size equal to make a hierarchy in the design.
The font I’m using for the text is Lemon Milk Bold.

Pro Tip: This picture has a solid color on which text is easily visible but if you are using any other picture on which text is not much visible. To make the text clear on the design make a new layer below the text layers and paint a black dot with Soft Round Brush having the size of 600 to 800 pixels and then decrease its opacity to 50%. This will add a black shadow behind the text to make the text more pop in the design.
Adding Website Info. for Twitter Banner Design:
The next thing of a banner on the billboard is to add contact info but for Twitter, we are only adding our website for now because we want our viewers to reach us after seeing the banner so adding website info is very crucial.
For that go to the text tool and add your website name in Montserrat Font and make it a little smaller. Place it at the bottom center of the Twitter banner.
Optional: For other details, Now duplicate the layer by pressing Ctrl + J or Command + J or you can right-click on the layer and select duplicate layer. Change the text of the duplicate layer with the Twitter name or email or anything you want your viewers to reach.
The alignment is your choice but focusing on keeping things simple is the ideal way of designing in these latest years.
Adding Logo for Twitter Banner Design:
After all these details we should add the logo of the company. In order to do that, drag & drop the logo PNG on the document and resize it.
For this design, I’m going to place this logo on the top center the design.
There we have our design completed for Twitter. You can see it is really simple & easy to design as well as look very premium & elegant too.
You can also add some elements like shapes on the banner to make it more attractive but it’s completely your choice you want to make it look.

Finally, we need to save our Twitter banner. Go to ‘File > Save As’ and choose a file name and location for your banner. Make sure to select ‘JPEG’ from the ‘Format’ drop-down menu and click ‘Save’.
And that’s it! You’ve now learned how to make a Twitter banner in Photoshop. Try experimenting with different fonts, colors, and images to create a banner that really reflects your personality.

How to Create a Multi-Image Twitter Header Image With Adobe Photoshop
Twitter has recently increased the size of header images on profile pages, and you can now upload a 2120×1192 pixel image. This provides some great opportunities for businesses and personal users to show off their brand, however, it also requires a little more work to create an effective header image. In this article, we’ll show you how to create a Twitter header image that contains multiple images, which can be used to effectively showcase your brand or personality.
Creating a Twitter header image with multiple images is actually quite simple, but it does require the use of Photoshop (or another similar image editing program). Follow the steps below and you’ll have your new Twitter header up in no time!
Step 1:
First, open up Photoshop and create a new document to make a Twitter banner. For this example, we’ll be using a document size of 1500×500 pixels.
Step 2:
Next, you’ll need to add the images that you want to use in your Twitter header. In our example, we’ll be using three images: one for the background, one for the profile picture, and one for the username. To add an image, simply click on the “File” menu and select “Open.”
Step 3:
Once your images are added to the Photoshop document, you’ll need to position them how you want them to appear in the final Twitter header.
You can move the images around by clicking on the layer that you want to move in the “Layers” panel and then using the move tool to position it where you want it. To resize an image, click on the “Transform” tool in the main toolbar and then drag the corner of the image until it’s the size that you want.
Step 4:
Now that your images are in place, it’s time to add some text to your Twitter banner! To do this, simply click on the “Text” tool in the main toolbar and then click anywhere on the canvas to add a text box.
Then after adding a simple message you can also change the color, size, and font of your text using the options in the top toolbar.
Step 5:
Once you’re happy with how your text looks, it’s time to add some finishing touches to your banner. To do this, click on the “Layer Styles” icon at the bottom of the “Layers” panel and then select the “Gradient Overlay” option.
Step 6:
This will open up a new window where you can customize the gradient effect. For our purposes, we’re going to keep things simple and just use a two-color gradient that goes from light to dark.
Step 7:
Once you’ve selected your colors, click “OK” to close the window and apply the gradient overlay to your layer to make it look more cool & catchy.
Step 8:
Finally, we need to save it. Go to ‘File > Save As’ and choose a file name and location for your banner. Make sure to select ‘JPEG’ from the ‘Format’ drop-down menu and click ‘Save’.
Related: How to Design a Billboard in Photoshop (Step-By-Step).
Related: How to Make a Business Card in Photoshop (Premium Quality).
Related: How to Make a Twitch Banner in Photoshop (8 Easy Steps)
Final Words | How to Make a Twitter Banner in Photoshop
I hope you’ve learned much from this tutorial in order to design a Twitter Banner.
That’s all, then! You now know how to use Photoshop to create a Twitter banner. To make a banner that truly captures your personality, try experimenting with various fonts, colors, and photos.
Happy Editing & Have a Good Day!

I’m a Graphic Designer with 5+ years of experience. Specialized in Adobe Photoshop.
Get Info About Any Photoshop Editing, Photoshop Manipulation, Logo Design, Flyers, Business Card, Cartoon Portrait and any type of work-related to Graphic Design and Photoshop Editing.


