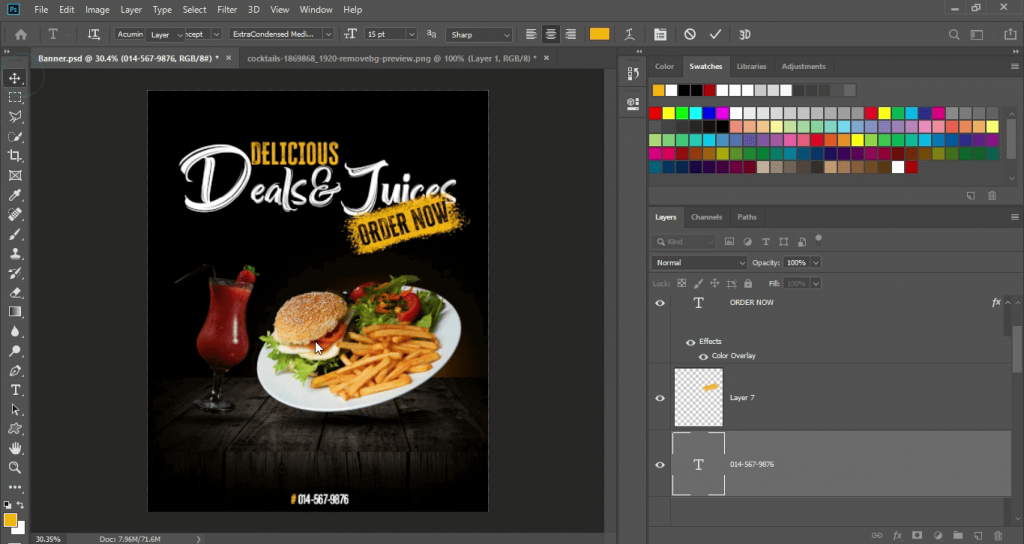
In this Step by Step tutorial, we learn how to make a banner ad in Photoshop for any product. Once you design a banner in Photoshop, you can swap images and text as needed for future banners. This blog shows you the basics of adding an image, text, and a button to a banner.
This tutorial is written for beginners. If you’ve never used Photoshop before, you should get familiar with the concept of layers in Photoshop. So, Let’s Go For It!
Table of Contents
Steps to Make a Banner Ad in Photoshop:
Setting Up a Web Banner Design File
In Photoshop, go to File > New. Name the document of your choice. Set the file to the following dimensions:
- Width to 1500 px
- Height to 2000 px
- Orientation to Portrait
- Resolution to 300 px or 72 px
- Colour Mode to RGB
Then click Create.
Designing Your Web Banner
Step 1:
First of all, add a black background to our canvas.
In this tutorial, I’ll be designing a food-related Website Banner, so we have to import the images that we have to use as a product in the banner. In this case, those images are wooden surfaces.

Step 2:
After importing a wooden surface, we have to add some black color to the corners of that surface to make depth to the design.

Step 3:
So After that, we have to add our product to that surface. In our case, we have a food image i.e. Burger and a glass of juice. Then we have to align them according to our requirements.

Step 4:
So After that, we have to add some shadow below our product to make a really nice look and depth. We can use the simple brush tool to do that by painting a simple black circle and putting it below the product.

Step 5:
After that, we have to add some light to the product to give it a professional look. In our case, we just painted a circle of orange color behind the product i.e. Burger Plate. You can also skip this step.

Step 6:
Now we have to text which will be an offer or advertisement we want to show to the audience. In my case, I used two fonts to add some really nice text of “DEALS & JUICES” as the main text and “Order Now” to offer text and painted a simple stroke of the orange-colored brush.

Step 7:
Now we have to give our contact info at the bottom and the logo of the company on top.

Step 8:
Now to give the banner a final professional touch we have to add some salt smoke on the back of the product and decreased its Opacity to make it realistic.
And we also have to give it a warming Photo Filter to make it even more professional.

Conclusion | How To Make A Banner Ad In Photoshop
After exporting this will be your final design of the website banner.

Keep Learning:
Check Out Related Video For More:

I’m a Graphic Designer with 5+ years of experience. Specialized in Adobe Photoshop.
Get Info About Any Photoshop Editing, Photoshop Manipulation, Logo Design, Flyers, Business Card, Cartoon Portrait and any type of work-related to Graphic Design and Photoshop Editing.


Howdy, i read your blog occasionally and i own a
similar one and i was just curious if you get a lot of
spam feedback? If so how do you reduce it, any plugin or anything you can recommend?
I get so much lately it’s driving me insane so any assistance is very much appreciated.
Yes, It happens also with me… Too many spam comments are so much headache. There are a lot of plugins I think which will solve it but I’m currently not using any of them. I’ll get any info about that and will tell you if there is any good plugin.