Wanna know how to vectorize a logo in Photoshop? Landed in the right place.
Let us take a logo we have in PNG image with a transparent background which is very low resolution and we have to convert that logo into a high-resolution vector so that we can use that vector in our different documents and mock-ups without losing its quality. This conversion is called vectorization.
Mostly when you have to make vectors but Photoshop also supports vector, or path-based, elements, including live type and other forms of imagery.
Now Photoshop is more versatile software as in this if we have a simple png or jpeg logo we can convert that logo to vector to make it a high resolution in sense of using that logo in other pictures and projects.
In this tutorial, I going to show you how to vectorize a logo in Photoshop and this process is actually quite simple and very beginner-friendly.
The best tool for creating vectors is Illustrator but Photoshop is a very versatile tool, we can create vectors on it also but conversion to vector is much easier and simple on Photoshop.
The following article is a brief instruction where we will learn first to convert that low-resolution logo to high resolution and then we have to vectorize that logo because if we convert that low-resolution logo to vector then in your projects it will be low res.
Let’s Go For It!
Table of Contents
Change Logo Resolution
First, we should have our logo as PNG means your background should be transparent in the logo image.
If your logo is not transparent you should read this article to remove background:
Related: How To Make Part Of An Image Transparent In Photoshop
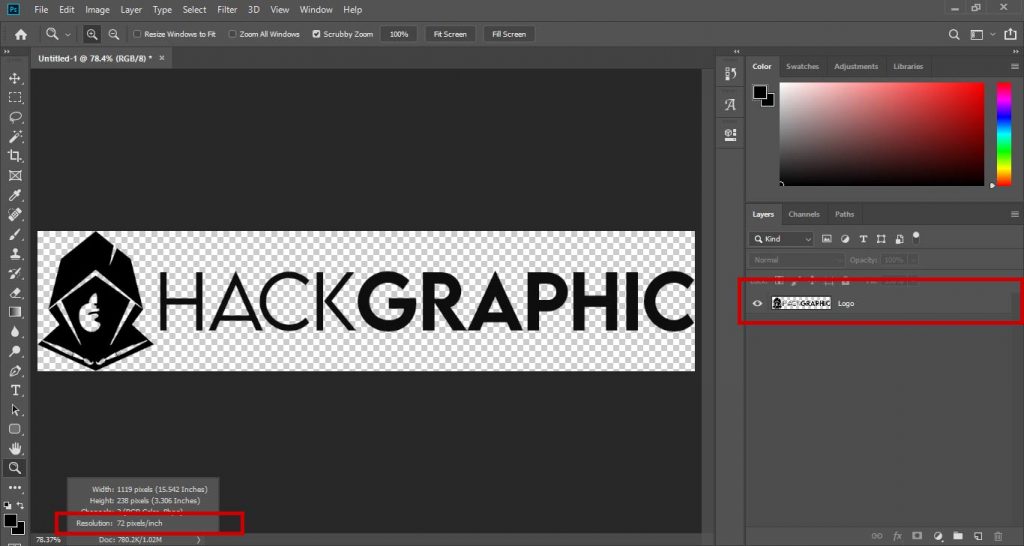
Step 1: Open Your Logo Image
First, we have to open our PNG logo in Photoshop and check its resolution (pixels per inch). The resolution should be 300 so that we can use that logo anywhere we want.
Step 2: Change Image Resolution
Now after opening your PNG logo in Photoshop, we have to change its resolution.
To do that we have to go to Image > Image Size.
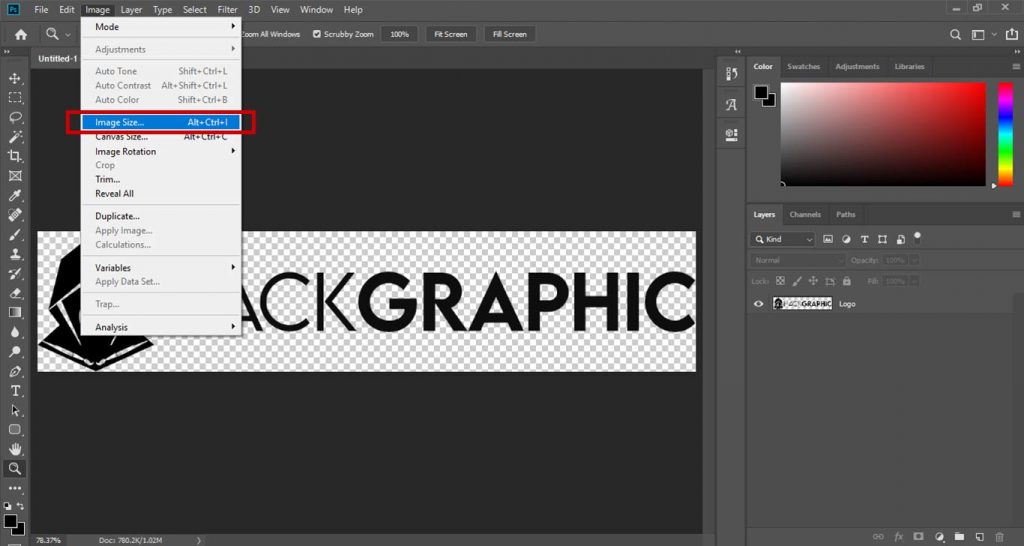
We can also press Alt + Ctrl + I for PC and Option + Command + I for Mac to open the Image Size Panel.
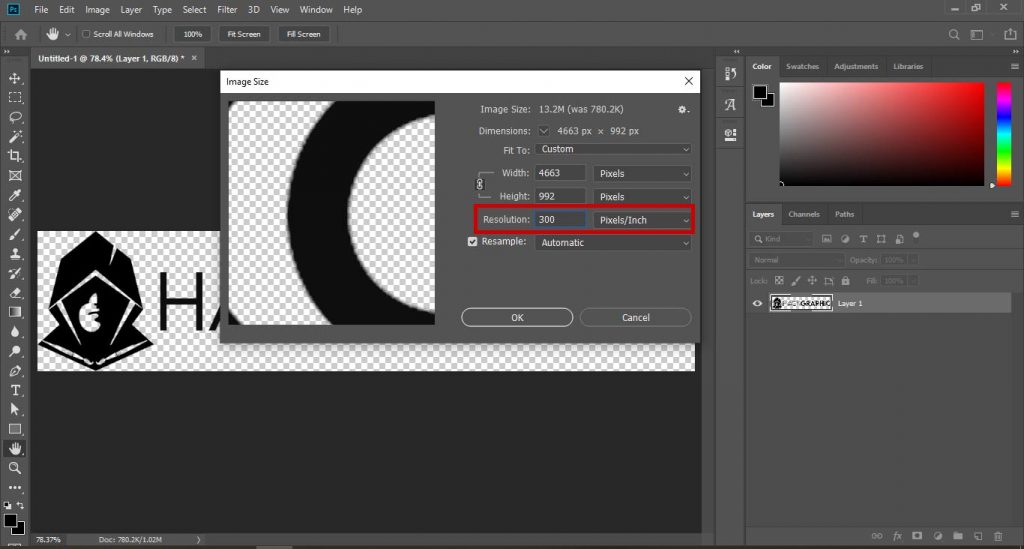
Now in this panel, we have our height and width size also we can increase that so that we don’t face any difficulty using that logo on large projects.
We have to change our resolution to 300 Pixels/Inch.
So we have our image size and resolution perfect for making vectors but if we have images blurry and we have pixelation in our logo then we have to remove that pixelation means we have to make our logo high res.
To learn how to do that you can read articles about removing blurriness and pixelation and making a low-resolution logo to high resolution. Click Here!
But if our logo is already perfect to use in projects means it has no blurriness or pixelation, we have to follow the next steps.
Vectorize Logo In Photoshop
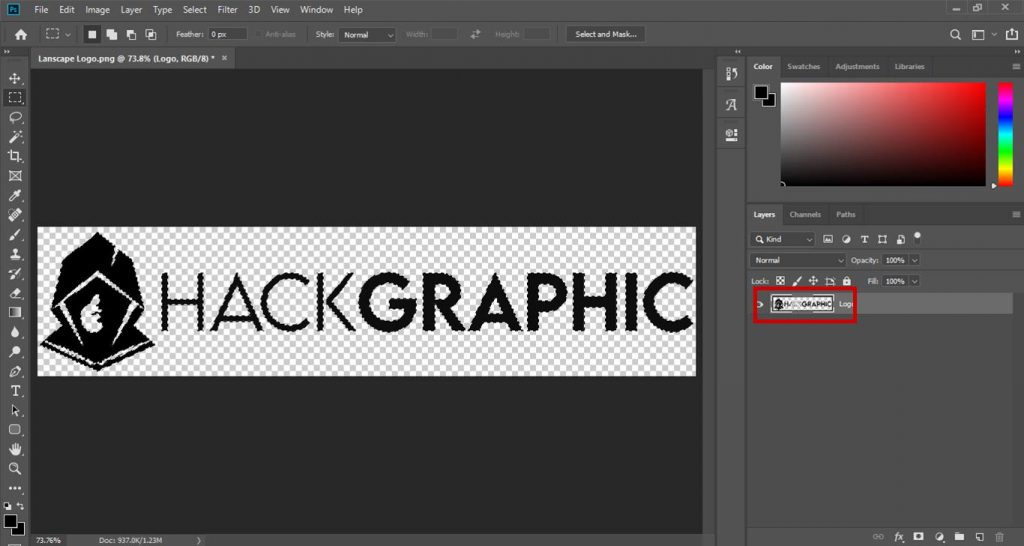
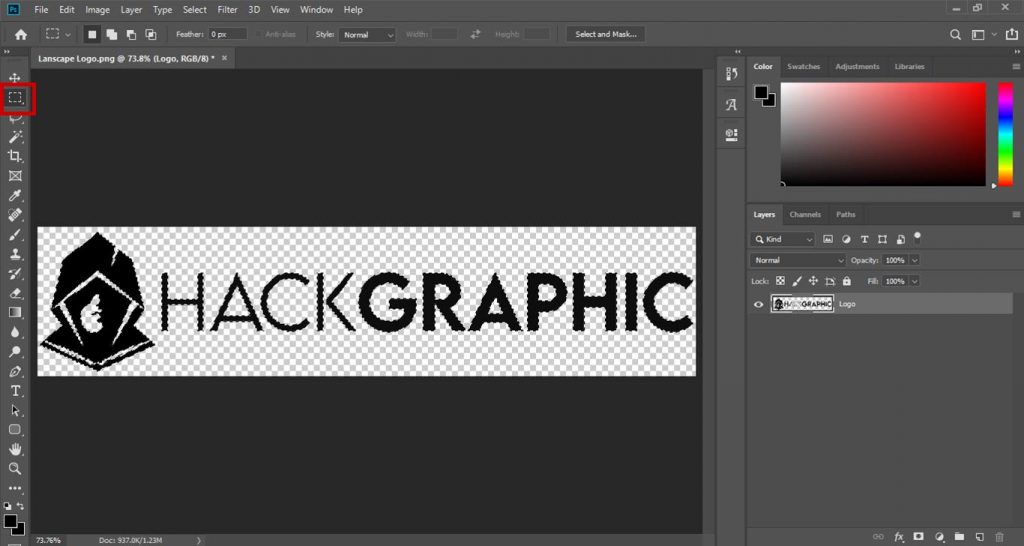
Step 1: Selecting Your Logo
First, we have to select our logo you can use any tool to do that but the easiest method to do that is:
For PC:
Hold Ctrl and click on the thumbnail of the layer of the logo in the Layers Panel.
For Mac:
Hold Command and click on the thumbnail of the layer of the logo in the Layers Panel.
You should see the black and white insects crawling around the logo when selected.
Step 2: Making Work Path
Now we must create a work path for that logo, and to do so, we must choose the Marquee Tool from the Tools Panel.
Right-click on the logo’s selection and select Make Work Path from the menu and set Tolerance to 1.0 pixels.
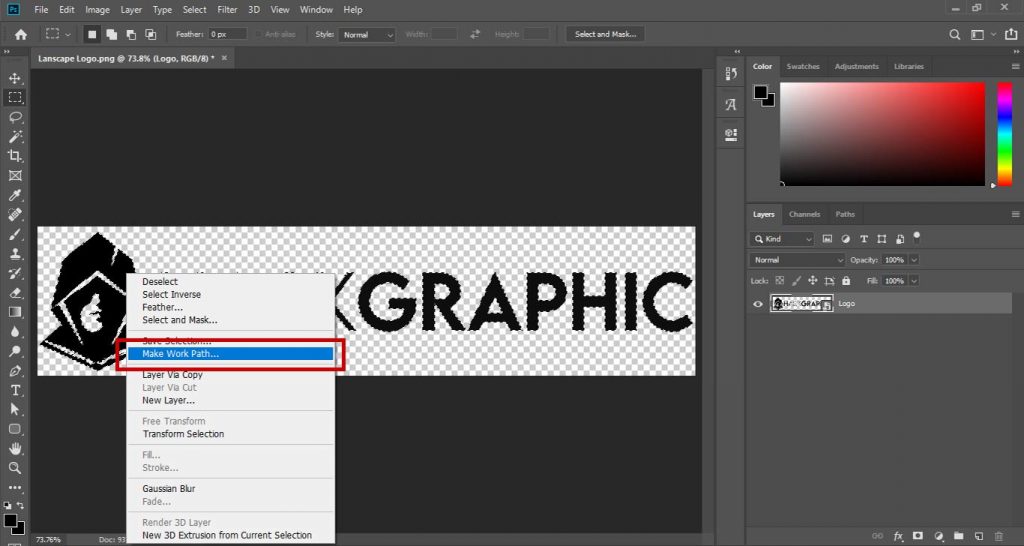
This will create a work path around that logo.
Step 3: Create Vector Mask
Now we have to make a vector mask of that logo and to do that got to Tools Panel and select Direct Selection Tool.

Then right-click on the logo and select Create Vector Mask.
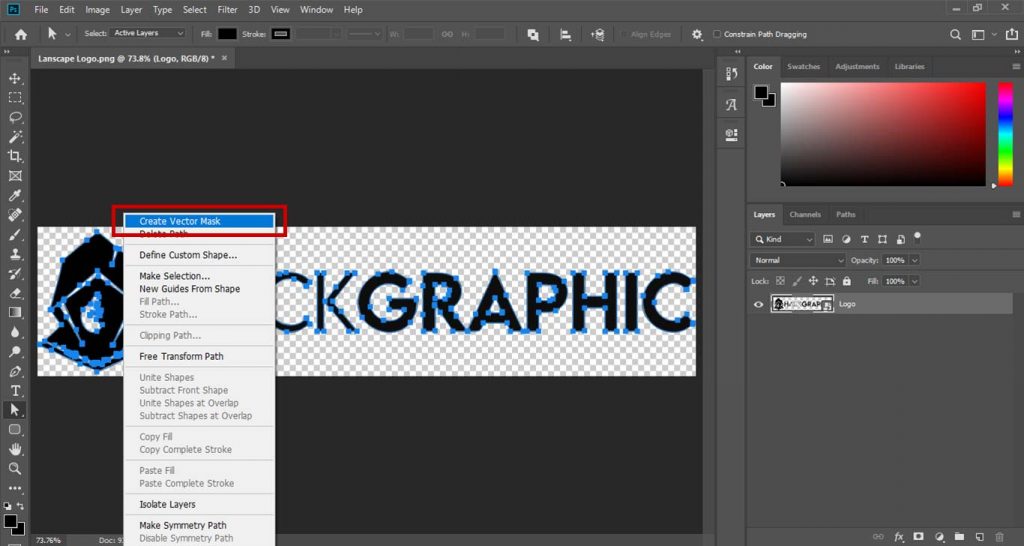
Now, this logo is a vector and you can rescale it to any size without losing any resolution.
Step 4: Exporting Vector
We have to export this logo as EPS or SVG. To do that you can go to Save As and select Photoshop EPS format and save the file.
And to save as SVG format, you can go to Export > Export As.
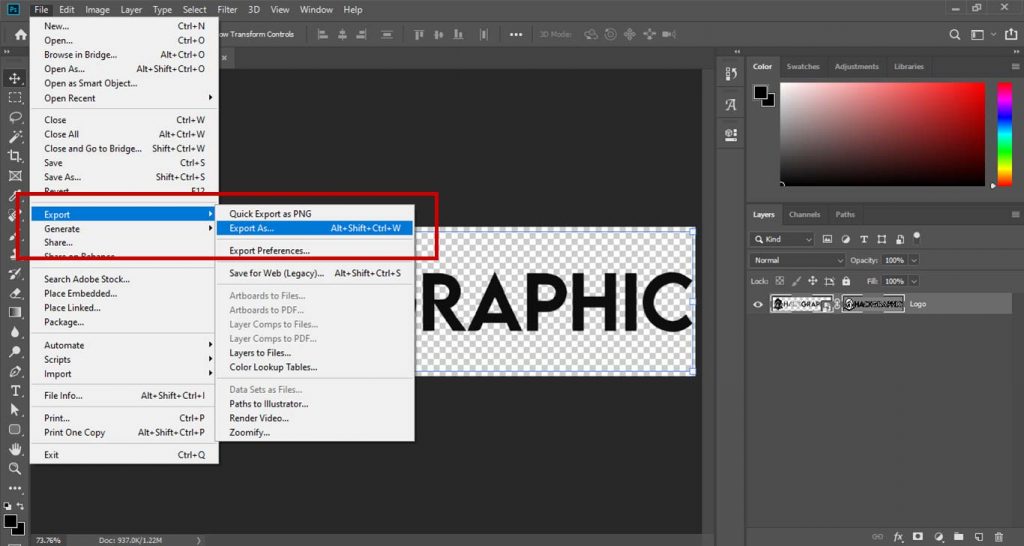
Then select SVG format and save the file.

Conclusion:
This is how to vectorize a logo in Photoshop. By following this step-by-step article you should be able to convert your low-resolution logo to a high-resolution vector.

I’m a Graphic Designer with 5+ years of experience. Specialized in Adobe Photoshop.
Get Info About Any Photoshop Editing, Photoshop Manipulation, Logo Design, Flyers, Business Card, Cartoon Portrait and any type of work-related to Graphic Design and Photoshop Editing.


Hello! I simply want to give you a big thumbs up for your
great information you have got here on this post.
I am returning to your blog for more soon.