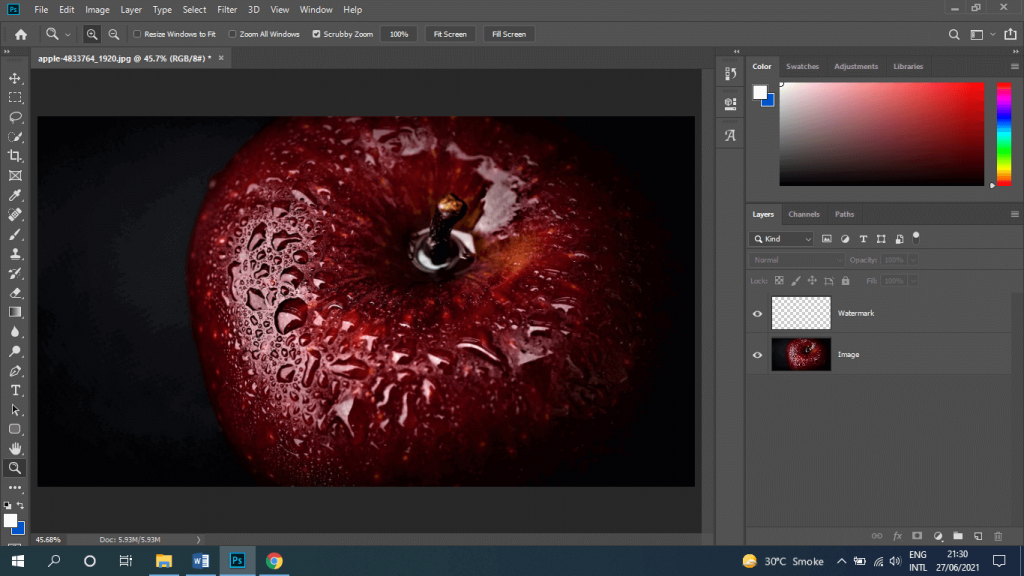
A watermark is an identifying image or pattern in paper that is used to show the ownership of that document, image, photograph, or video. To know how to make a watermark logo in photoshop follow these instructions.
To protect your content, your photograph, images and videos we should use watermark so that it cannot be claimed by any other photographer or designer.
Although adding a watermark with your logo or simply some plain text to your photographs to demonstrate ownership and aid in brand marketing is not a foolproof approach to stop image theft, it is a wonderful place to start.
So here we are going to learn how we can add our own watermark on our images.
I’ll show you 3 best methods to add Watermark.
So Lets Go For It!
P.S. If you want to learn how to make paint splatters to put on your images in photoshop. Click here!
Table of Contents
Method # 1:
HOW TO ADD TEXT WATERMARK
For making a text watermark in Photoshop, you can simply make a new text layer to your image by using the text tool and typing in your name, business name, or website in the font and color you desire.
Your watermark should not be more disturbing so I suggest keeping the font fairly small and easy to read. You want it to be seen, but you don’t want it to be the center of attention.
Step 1:
Creating New Layer
- Open the image you want to add a text watermark to.
- Create a new layer by selecting Layer > New>Layer.
- Rename the new layer “Watermark” in the dialogue box then click OK.

Step 2:
Adding Text
Making sure you are working on the new layer
- Select the text tool.
- Now click anywhere on the image to begin adding the text. Type the text you want to use.
You can adjust opacity from the layers panel to lighten it up if needed because your watermark should not be the center of attention so we have to lighten it a little bit. This is how to make a watermark logo in photoshop.

Method # 2:
HOW TO MAKE A LOGO WATERMARK
Other way and most used way of adding a watermark is we have to add the logo of our company or business of which that image related to.
But we have to make sure logo should not be too big and catching to be disturbing.
Step 1:
Opening Images
- Open Photoshop.
- Open the image on which you want to add a watermark.
- Open Logo image and copy it using Ctrl + C or Command + C.

Step 2:
Adding Logo
- Now, paste your logo image to the image you are watermarking using Ctrl + V or Command + V. You can then drag your logo to reposition it and resize as needed.
Now, most importantly make sure your logo should be transparent because if it has a background it look so disturbing.

Step 3:
Adjusting
Now adjust the opacity as needed to get the transparency to your liking. Again, less is more. If you use black and white logo, it will be more useful.

Method # 3:
HOW TO MAKE A CUSTOM BRUSH TO APPLY YOUR WATERMARK
The FASTEST and EASIEST way to quickly add watermarks to your photos is adding a watermark using a custom Photoshop brush. You can set this up with both a text or logo design.
After making your custom brush, you can simply select the brush tool, click on the watermark brush and then just click anywhere you want on your image to place the watermark.
Here step by step tutorial on how to make a watermark brush in photoshop:
Step 1:
Logo Prepration
To ensure that the quality won’t be affected in case you need to scale it down once its added it to your image so make sure your logo resolution is around 400 pixels – 1000 pixels.
Make sure to have a white background behind that logo to make brush of it.

Step 2:
Make Logo A Brush
- Once you have the image the way you want it and opened in Photoshop, click on Edit > Define Brush Preset.
- Name it something easy to locate in the brush list. “Watermark” or “Logo” are the most obvious options.
- After naming your brush, press OK to save it. You now have a custom watermark brush ready to use at any time!

Step 3:
Using Brush Logo
To use your custom watermark brush,
- Use your mouse to select the brush tool from the left toolbar and click on that brush from the list.
- You can use the “B” keyboard shortcut to access it then right-click to access your brush list and find it.
- Now click anywhere on your image to place the watermark where you want it to be.

This is how to make a watermark logo in photoshop. Now adding a watermark to your images will be as easy as grabbing the brush and placing it wherever you like!

CONCLUSION
Watermarking images is an important part of dsigning or photograpgy as To protect your content, your photograph, images and videos we should use watermark so that it can not be claimed by any other photographer or designer.
So to save time we should make a custom brush of our logo and use it where we want.
Watch Video For Some More Info:

I’m a Graphic Designer with 5+ years of experience. Specialized in Adobe Photoshop.
Get Info About Any Photoshop Editing, Photoshop Manipulation, Logo Design, Flyers, Business Card, Cartoon Portrait and any type of work-related to Graphic Design and Photoshop Editing.


