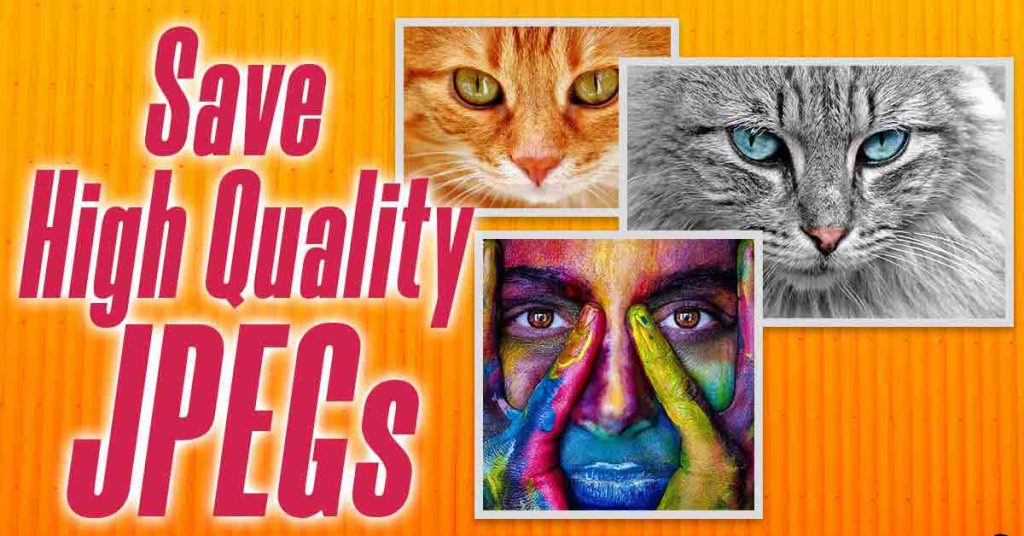
Wanna learn how to save high quality jpeg in photoshop? You landed in the right place. After you’ve gone through all the hard work of creating an image in Photoshop, it’s time to save and export it so you can actually use it. This should be the simple part, right? Not exactly.
Photoshop gives you the option to save your image in a variety of formats and settings, each of which has specific advantages. One of these formats is JPEG.
To save your picture or export them you should keep in mind two factors which are resolution and compression. So we have to know what these factors actually are:
Resolution:
Resolution is the most important factor to learn how to save high-quality jpeg in photoshop. The resolution of your image depends on where you want to use that image. If you just need image files for blogs or emails, lower resolution is better because their small size is much more important.
But if you plan to use your images in a magazine spread or photo gallery, try to get your images as high resolution as possible.
Compression:
Compression occurs when a file size shrinks because of how it is saved. For Example: JPEG is lossy while RAW is lossless.
Lossy File Formats:
Formats which reduce the quality of the image the more the file is compressed.
Lossless File Formats:
Formats which can be compressed without reducing image quality.
File Format Guide:
| Formats | Pros | Cons |
| JPEG | Great for putting photos on the web. | More padding. Compression is irreversible. |
| GIF | Low file size, lossless compression. Great for logos or simple art. | Only works whttps://www.hackgraphic.com/make-sketch-in-photoshop/ith images that have less than 256 colors. Very bad for photos. |
| TIFF | Lossless compression. Perfect image quality. Ideal for print. | Big file size |
| PNG | Great image quality. Can be used on web and print. | Not very well supported. |
DPI Equation:
The DPI equation is a helpful tool in figuring out how big your image will appear on the computer.
(Width of image in inches x DPI) x (Height of image in inches x DPI) = Image size on screen.
Example:
(6 inches x 100 dpi) x (4 inches x 100 dpi) = 600 x 400 pixels
But the most important thing is that for enhancing the speed and quality of your work by adding graphic card in to your device.
Table of Contents
Creating the Correct Image Size
Getting the proper image size is the first step. With the image opened in Photoshop, go to the “Image” menu and select “Image Size”.

This will open the Image Size window. Here you can set the image to whatever size you wish. Unchecking “Constrain Proportions” will allow for more freedom over image size, but at the risk of looking disproportionate.

Saving High Quality JPEGs For Web:
The formats most commonly used for web images are GIF and JPG. These formats offer low file sizes and moderate to very high quality after adding glow lightning.
GIF is commonly used for simple illustrations, while JPEG is more commonly used for photographs.
Step 1:
With your image open in Adobe Photoshop, go to the File > Export > Save For Web (Legacy).

This will open up the “Save for Web” window.
Step 2:
If you are working with a photo, the JPEG file format is suggested. If it is a graphic, such as a banner, logo or navigational tool, GIF format is suggested.
To use the JPEG format, select JPEG in the menu.
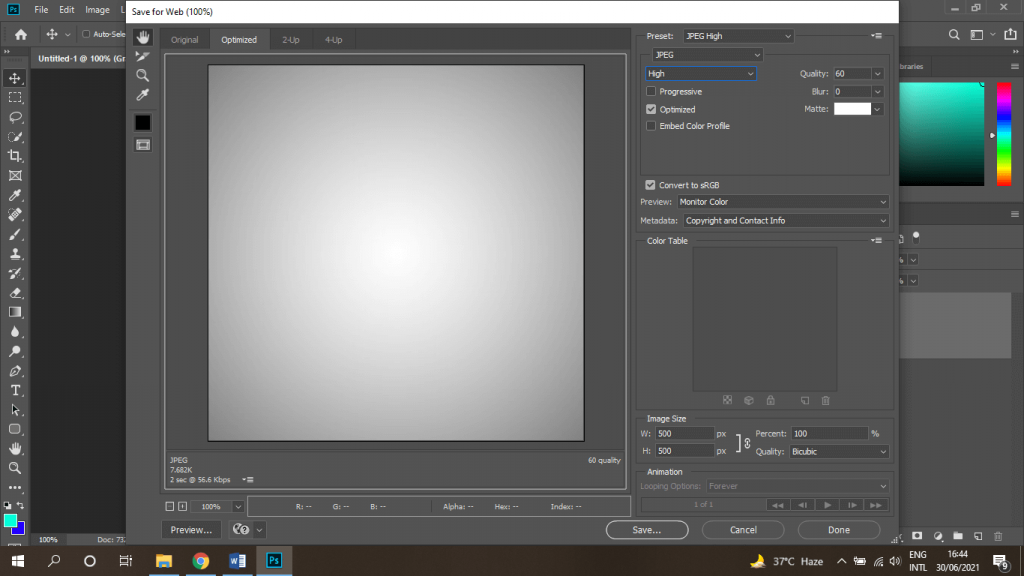
Step 3:
To optimize to a specific file size, click the arrow to the right of the Preset menu, and then click Optimize To File Size.
Enter a number in the Desired File Size text box, and select either Current Settings, which optimizes for the current settings, or Auto Select GIF/JPEG, which automatically determines whether JPEG or GIF is the better format.
Do one of the following to specify the compression level:
Choose a quality option (Low, Medium, High, and so on) from the pop‑up menu under the optimization format menu.

Click the arrow in the Quality menu and drag the Quality pop‑up slider.
Enter a value between 0 and 100 in the Quality box.
The higher the Quality setting, the more detail is preserved in the optimized image, but the larger the file size. View the optimized image at several quality settings to determine the best balance between quality and file size.
Step 4:
Select Save from here if you want to export the image now. Select a location to export the image. This is how to save high-quality jpeg in photoshop. As JPEGs are mostly used for web purposes

Your image is now web-ready.
Exporting Images for Print
For instance, If you plan to use your image for print, save it as a PDF. Photoshop PDF supports vector images which means the image will not lose its quality when scaled up or down.
When preparing images for print, the highest quality images are desired. The other ideal file format choice for print is TIFF, followed closely by PNG.
With your image opened in Adobe Photoshop, go to the File > Save As.

This will open the ‘Save As’ window.
Select what format you wish to use for your image and click “Save”.
Your image is now print-ready.
And here is top option for your work to increase your quality and speed.
Conclusion:
The thing which we concluded that we mostly need JPEGs for web purposes as they have small sizes and low to mid resolutions. You can also save JPEGs in high resolution but other formats work better in means of printing purposes.
Wanna Earn Money:
Click Here To Learn 10 Ways To Make Money Through Photoshop.
Watch Video For More Complex Info:
Frequently Asked Quesitons
To save a PSD file as a high-quality JPEG in Photoshop, simply go to File, select “Export,” then choose “Save for Web (Legacy).” Adjust settings for quality and format, and click “Save.” Your PSD masterpiece is now a stunning, high-res JPEG ready for sharing!
Launch Photoshop and open your image.
Select Image › Image Dimensions.
Resample Deselect. The current width-to-height ratio will be automatically locked as a result.
To modify the Resolution, enter new values.
Enter new values for Height and Width to change the Document Size.
Launch Photoshop and Open the File You Made. To change your export preferences, open File > Export > Export Preferences. Personalize your export settings by deciding on a format, quality, and final destination. To export using your saved settings, go to File > Export and go to the top of the menu and select Export as which quality you want.

I’m a Graphic Designer with 5+ years of experience. Specialized in Adobe Photoshop.
Get Info About Any Photoshop Editing, Photoshop Manipulation, Logo Design, Flyers, Business Card, Cartoon Portrait and any type of work-related to Graphic Design and Photoshop Editing.


Listening to a portable CD participant in your car
seems like an excellent possibility, proper? With this template, you can promote
something from membership T-shirts to automobile elements.
And with this template, you’ll be one step ahead of
your competitors! In immediately’s world, it is important
to be one step forward. In case you are concerned
about the problem of procrastination on the earth, and you want
to create your own handy software for monitoring tasks, then this is your choice!
Useful studying (reading good books) expands an individual’s horizons, enriches his inside world, makes him smarter and has a optimistic impact on reminiscence.
So, that’s why, functions for studying books are most related in at
present’s reading society. Reading books increases a person’s vocabulary, contributes to the development of
clearer considering, which lets you formulate and express thoughts more lucidly.
It’s the kind of comfort that permits you to just zone out and play with out worrying about niggling
key issues.