Wanted to know how to make an icon in Photoshop as well as a professional elegant looking icon. As Graphics designers we should be well-known for designing any custom icon with different variants.
Table of Contents
What is Icon?
Everyone has to understand what an icon is, which is a pictorial representation of a message. For example, if you see the graduation cap image somewhere, you can infer that it has something to do with graduation, college, and high school.
We also know that a successful icon will attract more consumers to the application itself.
There are different types of icons in which we can discuss app icons that are used for apps, we have social media icons that represent the social media platforms and we also have many other icons we use in our graphical projects or wherever we want.
In this article, I’ll show you how to make an icon in photoshop and then I’ll also show you to design different variants of that icon to use them accordingly in Photoshop.
First, I’ll show you how to make an elegant colorful icon for professional use on the web or other platforms.
Secondly, I’ll show you to make line icons for a client or any other purpose.
Let’s Go For It!
Making Classy and Elegant Colorful Icon in Photoshop:
Creating New Document:
First of all, we have to create a new document for making the icon. We have to make a square document and we can choose any dimensions and resolution
So For this, In Photoshop, go to File > New. Name the document of your choice. Set the file to the following dimensions:
- Width to 1000 px
- Height to 1000 px
- Resolution to 300 px or 72 px
- Color Mode to RGB
Then click Create.

Background Color:
After creating a new document, we have to make a solid color adjustment layer to make a color background.
For this go to Layers Panel and select Solid Color from adjustment layers and take a color for background whatever you want.

Hence I’ll use this light black color to make the icon pop: #242424

Designing Colorful Icon:
Step 1:
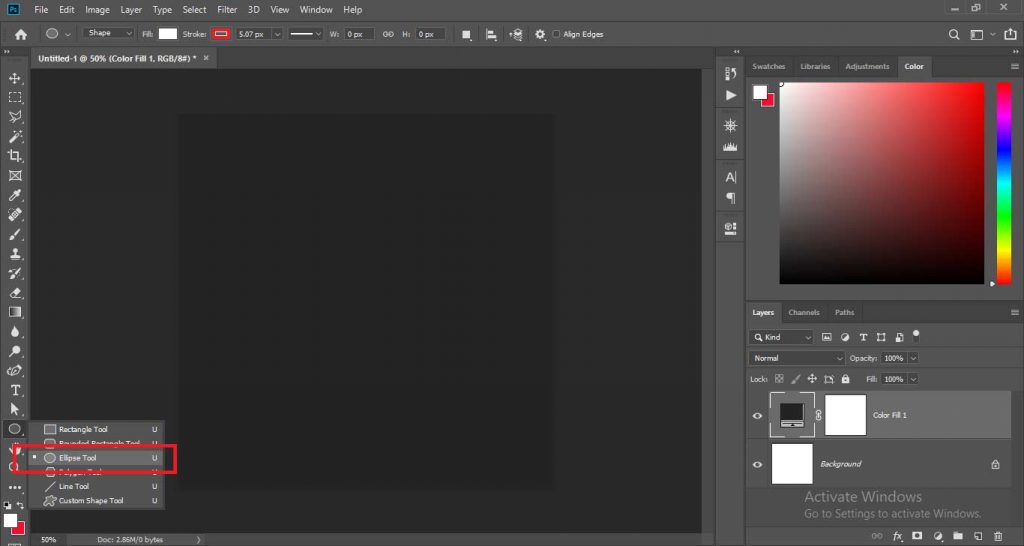
To make that elegant and professional icon, we first have to make a circle, and to make we have to go to Ellipse Tool.

From Ellipse Tool settings select Shape, set Fill color to #ffc14d and set the Stroke color to None, and set Stroke Width from 5 to 7.

Then make a perfect circle by just click on the canvas and set the size of the circle to 700 px in Width and 700 px Height.

Step 2:
Now we have our background and a circle and this is time to place the shape of the icon on the circle.
For shapes we have two options:
The first is to use the Custom Shape Tool of Photoshop to make the custom shapes on circles to make icons.

To do that go to Custom Shape Tool and from Custom Shape Tool settings select Shape, set Fill color to pure white, and set the Stroke color to None set Stroke Width from 5 to 7.
Select any custom shape and click on the circle and set the size of the shape to 400 px in Width and 400 px for Height.

The second is to download the shape of icons from any free website like I use EndlessIcons for this purpose to download free of cost shapes for icons. And place that shape in your document.
Arrange the custom shape in the center of the circle.
Step 3:
Now it’s time to make a professional-looking shadow of shape to make the icon look more elegant.
To do that we just have to go to Rectangle Tool.

Now from Rectangle Tool settings select Shape, set Fill color to pure black, and set the Stroke color to None.

Now we have to create a simple rectangle, rotate it at the angle at which we want the shadow.

Then arrange the rectangle sides so that one side of the shape matches with one side of the rectangle and another side of the rectangle with another side of a custom shape.
To make arranging more we can decrease the Opacity to 50% temporarily.
To understand it more efficiently look at the picture, you have to place the rectangle like this.

Step 4:
After making that rectangle, we just have to place the Rectangle layer below the custom shape layer and above the circle layer.
Then we have to make that rectangle clipping mask to circle layer by right-clicking on it and select Create Clipping Mask.

Step 5:
So we have our rectangle layer just limited to the circle. Now we have to make a layer of rectangle layer from Layers Panel.
Then after making the layer mask, select the eraser brush and erase the part of the rectangle which is on the upper side of the custom shape.

This will look like a shadow but it is so dark so to make it look good we have to change its Opacity to 25%.
In the end, we have our icon ready to rock!

Making Line Icon in Photoshop:
Creating New Document:
Likewise, to make a line icon, we have to create a new document for making the icon. We have to make a square document and we can choose any dimensions and resolution
For this, In Photoshop, go to File > New. Name the document of your choice. Set the file to the following dimensions:
- Width to 1000 px
- Height to 1000 px
- Resolution to 300 px or 72 px
- Color Mode to RGB
Then click Create.

Background Color:
As we did before, we have to make a solid color adjustment layer to make a color background.

So for this go to Layers Panel and select Solid Color from adjustment layers and take a color for background whatever you want.
I’ll use this light black color to make the icon pop: #242424
Designing Line Icon:
Step 1:
Likewise, To make that elegant and professional icon, we first have to make a circle, and to make we have to go to Ellipse Tool.
For this, we have to change the settings of the Ellipse Tool.

From Ellipse Tool settings select Shape then set Fill color to None and set the Stroke color to Pure White.
Then make a perfect circle by just click on the canvas and set the size of the circle to 700 px in Width and 700 px Height.

Step 2:
Now we have our background and a circle and this is time to place the shape of the icon on the circle.

To do that go to Custom Shape Tool and from Custom Shape Tool settings select Shape, set Fill color to None, and set the Stroke color to Pure White.
Then Select any custom shape and click on the circle and set the size of the shape to 400 px in Width and 400 px for Height.
Arrange the custom shape in the center of the circle.

For this type of icon, we only need these two steps and the icon is ready to rock!

Related: Learn 4 Ways To Fix Pixelated Icons And Logos In Photoshop Step By Step.
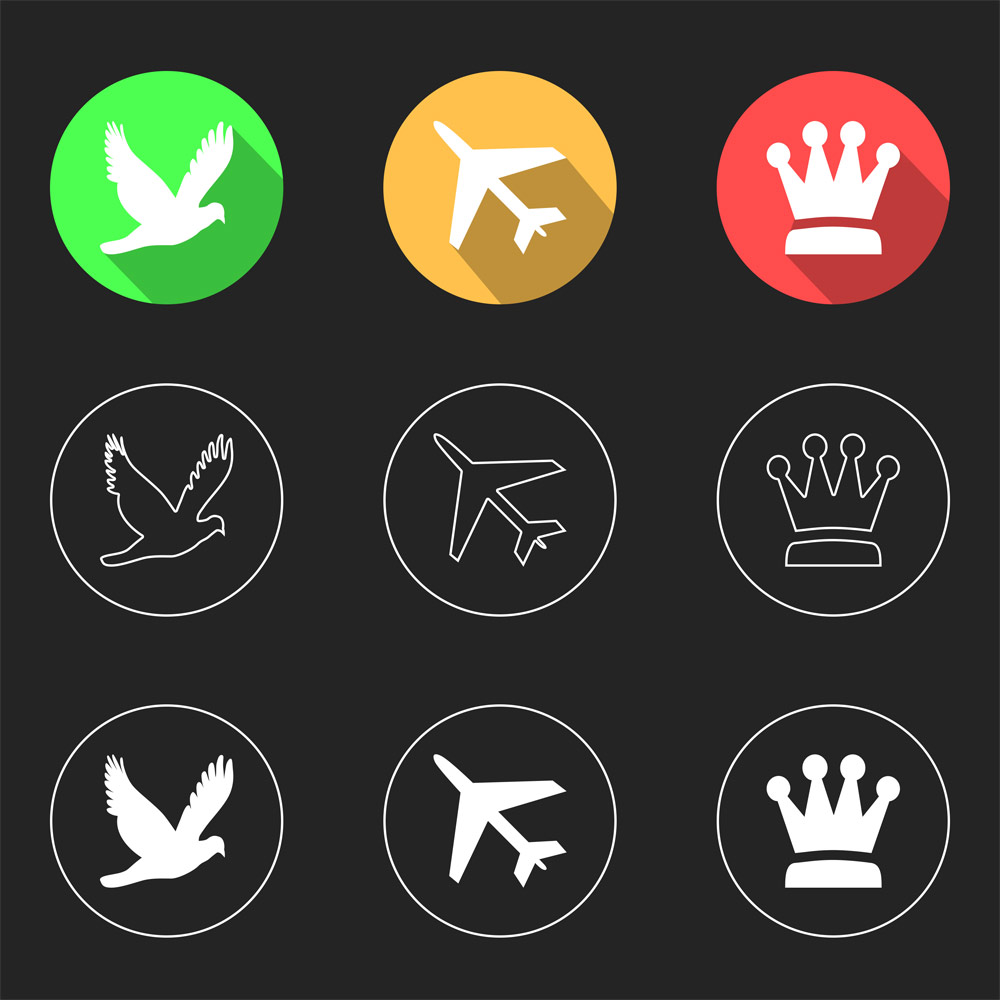
Final Icons:

See Video For More Ideas:

I’m a Graphic Designer with 5+ years of experience. Specialized in Adobe Photoshop.
Get Info About Any Photoshop Editing, Photoshop Manipulation, Logo Design, Flyers, Business Card, Cartoon Portrait and any type of work-related to Graphic Design and Photoshop Editing.


