
Glitch Effect on your pictures or text looks so much cool and it is also a great way to practice your skills in Photoshop and learn new techniques so in this article we’ll learn how to make a glitch effect in Photoshop in simple and easy steps.
The type of glitch we’ll be dealing with is widespread in television and video games. A distorted signal frequently causes these glitches, which are software flaws or bugs. As a result, your screen will be extremely distorted and difficult to see.
We can also add Glitch Text in it and to add it, Learn How to make a Glitch Text in Photoshop.
Photo effects are a terrific way to put your Photoshop talents to the test. Learn how to make a fun photo glitch effect with Channels Distortion, the Marquee Tools, and more in this tutorial!
Let’s Go For It!
Table of Contents
Step 1: Setup Files for Glitch Effect in Photoshop
Obviously, first of all, you have to open the image in Photoshop by simply dragging and dropping the image in Photoshop.
Now after that make a New Layer out of the Background layer by double-clicking it or you can click on the Lock on the right side of the layer in Layers Panel to unlock the layer.
Step 2: How to Desaturate a Photo in Photoshop
Decreasing Saturation
Now let’s Desaturate this image for a more monochromatic color scheme.
For this go to Image > Adjustments > Hue & Saturation and choose the model’s cutout layer. Reduce the Saturation to -95 to get rid of the majority of the color in the photo.

Fine Tuning the Image
Using Levels, you may fine-tune the main image even further.
For that go to Image > Adjustments > Levels and select the extracted model’s layer once more. Make for the RGB Channel’s Levels to set Shadow Input Level to 0, Midtone Input Level to 0.92, Highlight Input Level to 255, and Output Levels to 17, 255.
The end image after levels is subtle, and it lightens the model or object slightly.

Step 3: How to Create Glitch Distortion Lines
The next step in this glitch effect design is to create the jagged photo distortion that gives the impression that the graphics are skewed.
To do that Choose the Rectangular Marquee Tool now (M). On the photo layer, make two skinny selections. Create one at the bottom, then add another at the top while holding down the Shift key.
To switch to the Move Tool, use the V key on your keyboard. To shift the selections to the left, press the Left Arrow key.
In order to acquire the desired result, you may need to hit it numerous times or keep it down for a long period.
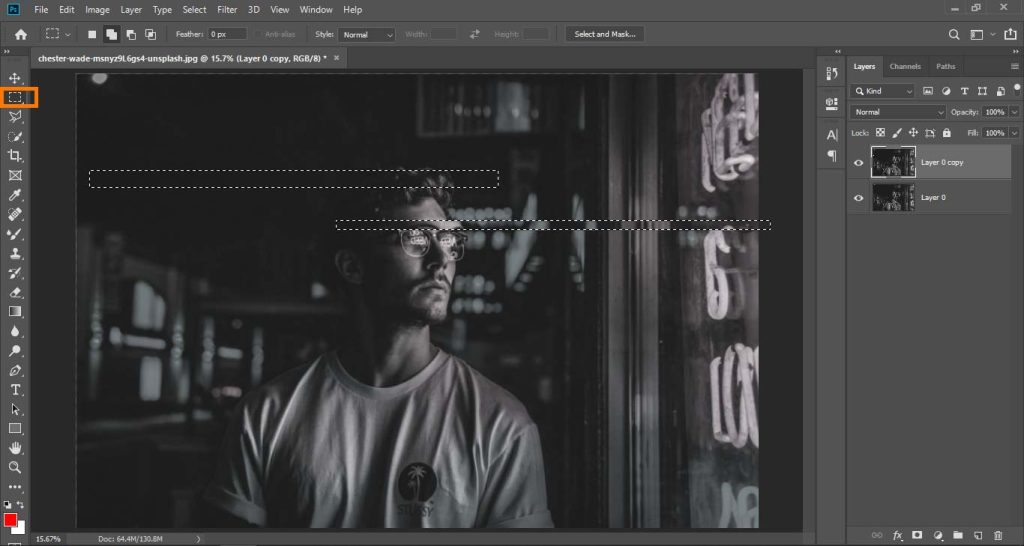
Bonus Tip: On a single layer, you can continue this technique, but if there will ultimately be open white spots that don’t look as attractive. To avoid this, duplicate the Model Layer and apply the distortion to the copy.
Make more selections with the Rectangular Marquee Tool (M), moving them in different directions with the Left and Right Arrow keys. I made two more and shifted them a little to the right.
Because this layer has a copy of the photo behind it, the resultant appearance shows the layer behind it rather than the white background.
Let’s make this go a little faster! Create more Rectangular Selections, moving the different sections out of place with the Move Tool (V). To create a more natural effect, alternate the size of the skinny and thicker selections.
Try not to distort the face too much as you get closer. Perform each glitch one at a time to see what works. This section is all about experimenting, so if you need to back up a step or two, simply press Ctrl+Z to Undo.
Now you’re finished with all your linear glitches.

Step 4: How to Make a Glitch Channels Distortion Effect
Now it’s time for some 3D color effects or you can say we have to distort the channels also!
Begin by merging the glitch layers together so that there is only one layer remaining. Then press Ctrl + J to duplicate the merged photo layer twice more. We have to make the main layer 3 times.
Uncheck Green Channel:
Then go to Blending Options by right-clicking the 2nd photo layer. Under Advanced Blending, uncheck the G, or Green Channel.
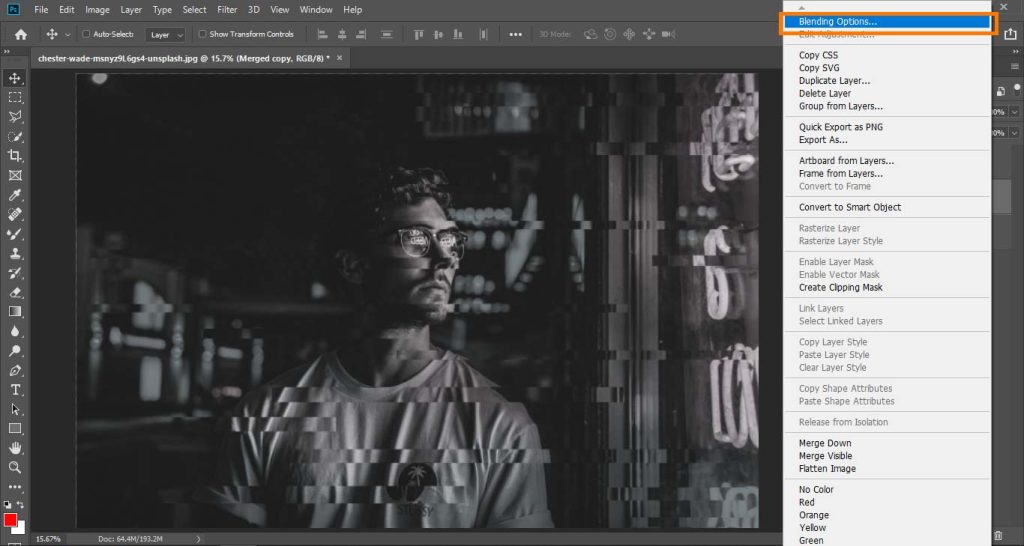
Uncheck Red & Green Channel:
Now you have to repeat the process. Under Advanced Blending, Uncheck both the Red and Green Channels for the 3rd layer.

Moving Layers Of Different Channels:
Now you may begin shifting each layer to create the ludicrous 3D effect. Use the Left Arrow key to shift the second layer to the left after selecting the Move Tool (V). Next, using the Left Arrow key, select the third layer and drag it to the left.
Here is what the process will look like.

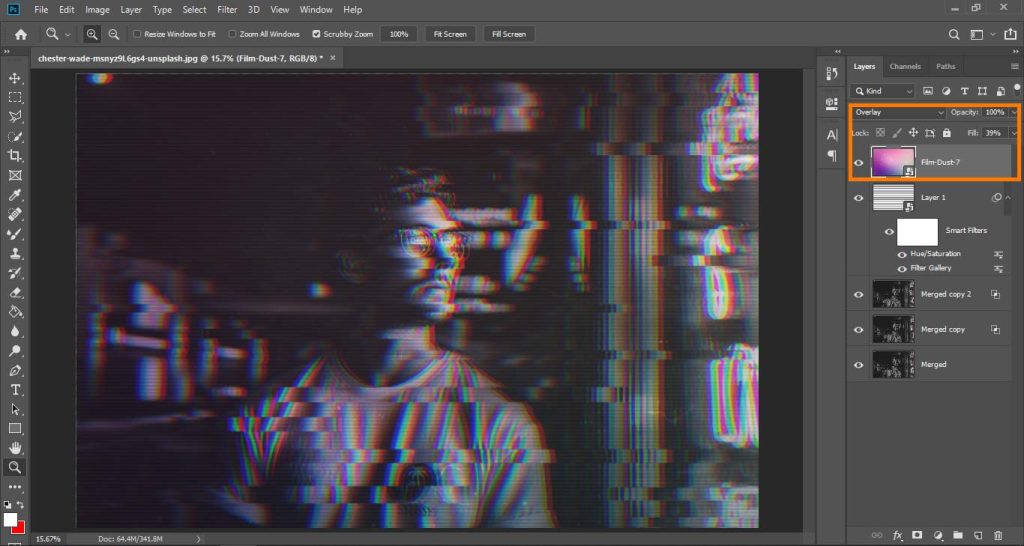
Step 5: Extra Adjustments To Glitch Effect
We are almost there, we just have to add some more adjustments to make the image look cooler.
In order to do that create a new layer, fill it with white color with the help of the Paint Bucket tool and convert it to Smart Object.
Then go to Filters > Filter Gallery and in Sketch Tab select Halftone Pattern.
In that use these settings are shown below:

Click OK. You can always come back and change these settings as it is a Smart Object.
Change the Saturation of this layer to 0% by going to Hue/Saturation in Adjustments.
Now change the Blending Mode of this layer to Overlay and Fill to about 20%.

Now for color, we can also add a Gradient Map but Here are some Free Dust Film Textures you can download and use any of them.
Click Here to get Free Dust Film Textures!
Just Drag and drop any texture on the picture and change its Blending Mode to Overlay and Fill to about 30% to 40%.
This will add a nice color to the image.
We can also add Glitch Text in it and to add it, Learn How to make a Glitch Text in Photoshop.
Here we have our Final Result!

Conclusion | How to Make a Glitch Effect in Photoshop
Here is the end of our tutorial on making a glitch effect. Hope you’ll like this content.
Happy Editing!

I’m a Graphic Designer with 5+ years of experience. Specialized in Adobe Photoshop.
Get Info About Any Photoshop Editing, Photoshop Manipulation, Logo Design, Flyers, Business Card, Cartoon Portrait and any type of work-related to Graphic Design and Photoshop Editing.


