
Wanted to know how to change the color of object in Photoshop in the easiest and realistic way possible? You are in the right place.
Now in the field of designing and art, we know Photoshop is a versatile and excellent software to use.
So let us have a picture of an object of which we have to change color from any color.
Suppose we have a shirt in blue color and we have to make its variants of color like that shirt in yellow, red or even black or white.
So that we can use that variants of shirts or any object in our marketing campaign or for a client.
The main thing is we have to change the color of object so we use Adobe Photoshop for this purpose.
We can change the color of any object like shirts, dresses, cups, curtains, etc.
Related: To Learn How To Change Hair Color In Just One Minute In Photoshop. Click Here!
The main thing is the techniques we will use to change color of object and In this article, I’ll show you these simple techniques in simple steps.
Let’s Go For It!
Table of Contents
Opening Your Picture in Photoshop
First of all, you have to open the picture in which you need to change color of object in Photoshop, and to do that you just have to Drag & Drop the picture in Photoshop.
Another way is to go to File > Open.
In my case, I have a picture of a model wearing a blue shirt of which we are going to change color.
Duplicating The Layer
The next thing we have to do is to make a duplicate of our layer so that we can use it as a backup. Press Ctrl + J (For Windows) or Command + J (For Mac) to duplicate your layer in Photoshop.
Another way of doing this is to go to Layers Panel. Right-click on the layer and click on Duplicate Layer to make a duplicate of that layer.
The main reason for duplicating layers is to keep the original layer as the backup to work non-destructively.
Adding Hue & Saturation Adjustment Layer
After duplicating the layer we have to change the color which means we have to change Hue of the picture.
For this go to Layers Panel and add a Hue & Saturation Adjustment Layer.
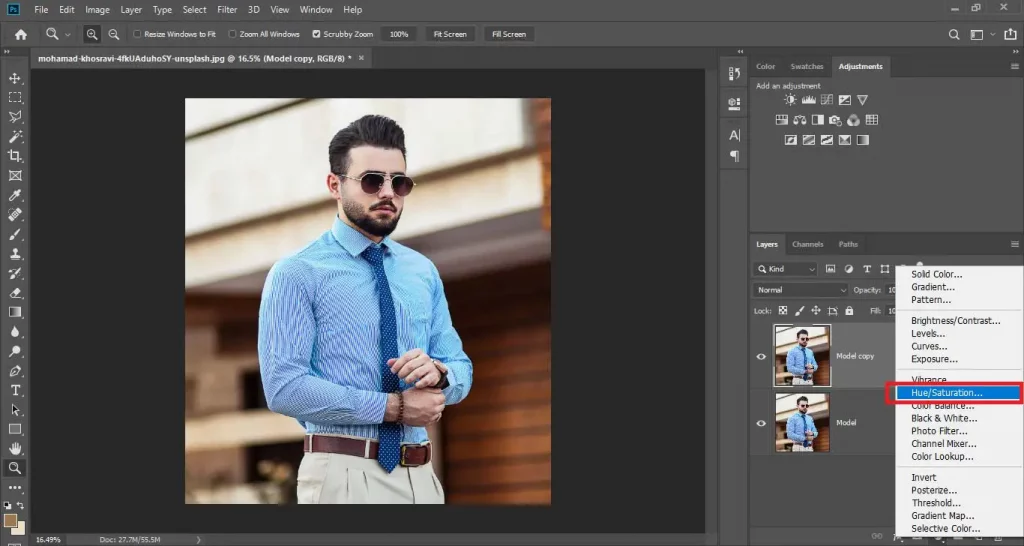
And to make the effect only visible to the duplicated layer we have to make it a clipping mask.
To do so right-click on the Adjustment Layer and select Create Clipping Mask.

Selecting Color For Object
So go to the properties of Hue And Saturation Adjustment Layer and select the hand icon below presets.
After selecting the hand icon, just click on the object of which you want to change color.
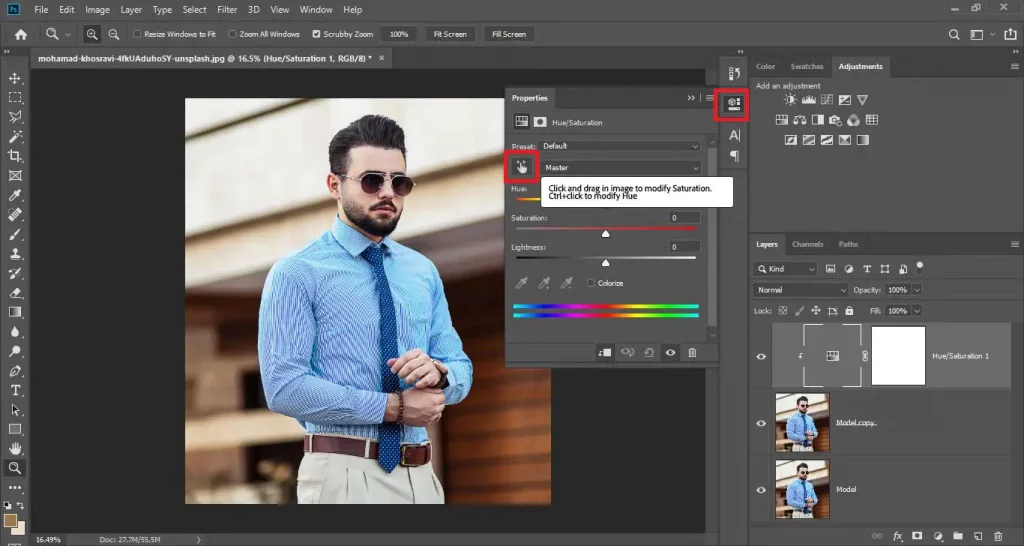
After selecting that color increase the saturation to 100+ to see the selected area.
In my case, this is the shirt of which I need to change the color.
If the object has one color it will select all of the colors but if the object has more than one color then you have to click on the Add to sample Eyedropper tool (with plus icon) from properties of Hue & Saturation Adjustment Layer.
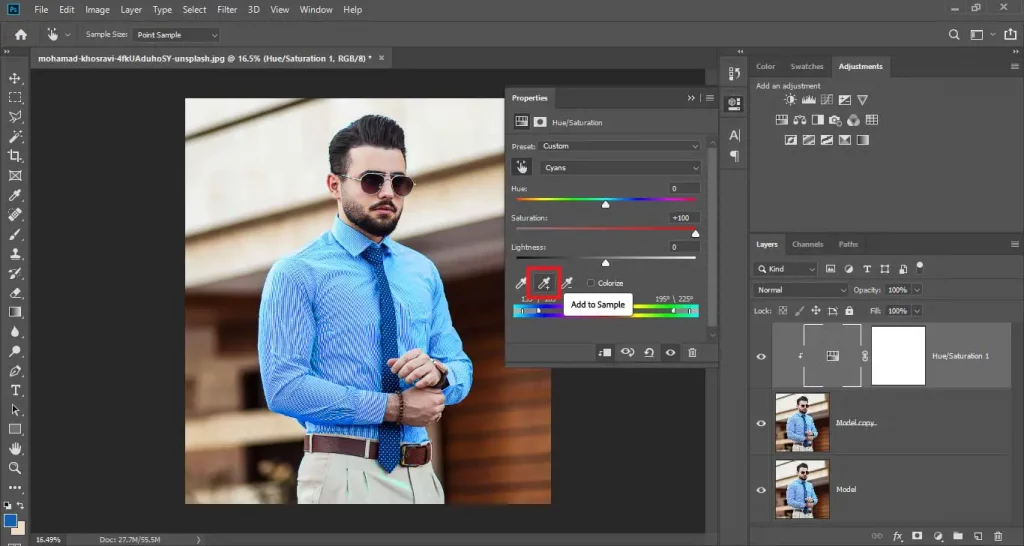
After that click on the remaining parts of the object which are not selected because we have multiple colors.
Like in my shirts, I have Cyans and blues so I first selected the cyans and increased the saturation to 100+ to see the difference and then selecting the eyedropper tool click on the blues of the shirt to make sure it is also selected.
Now again decrease the Saturation to 0 to get to the original colors.
So this is the time, where we have to change our Hue to change the color of the object.
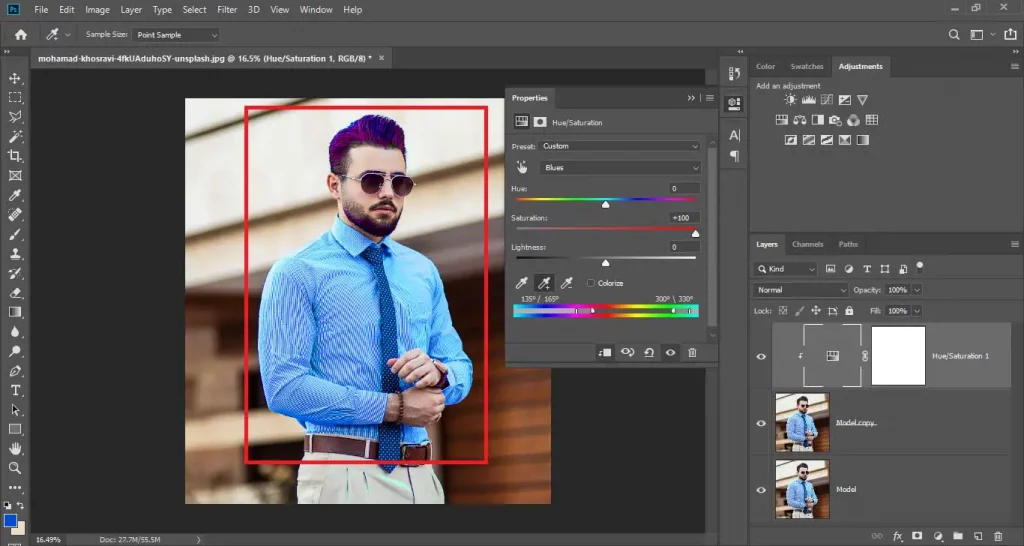
After selecting all the colors you want to change, change Hue to the value you want.
Like my example, I have Blue shirts and I changed Hue to 145+ which gave me a red shirt.

After that, we have to change the Hue to our favorite color (to that color of which we want our object to be). You can play with the Hue slider to change color.
Don’t worry that this is affecting the other parts of the picture, just focus on the color of object what you want them to be.
Masking
If the Hue is not affecting the other parts of the object except the main object then you can skip the step of masking.
But if the Hue to any other thing is affected by changing the Hue.
Then We have to mask our Hue & Saturation Adjustment Layer and remove the effect from the parts of the image where we don’t need that effect.
Now we have to make that effect visible only to object. So that the color change will only affect the object.
To do that select Brush Tool and make sure your Foreground color is set to Black.
In the settings of Brush Tool, take the Opacity to 100% and Flow to 60% – 80%.

Now with Soft Round Brush paint over the areas you don’t want the color change with Black color to get the Hue & Saturation effect erased from that area.
Make sure you are painting white on Layer Mask, not Layer.
If you accidentally painted on the object you can again add color change effect the effect by changing the foreground color to White and painting on the object.
You can toggle between Foreground and Background colors by simply Pressing X on the keyboard.
Like In my picture, I have successfully changed the color of the shirt to red but this effect is also affecting the blues of the hair of the model so I erased the effect by erasing the Hue and Saturation Adjustment from the hair part.
The more accurate you mask your effect, the more realistic the will effect looks.

Full Control On Colors
After masking you have complete control over the color of the object.
You just have to go to your Hue and Saturation Adjustment Layer and change the Hue to change the color of the object to any color you want and you can play with the Saturation slider also.
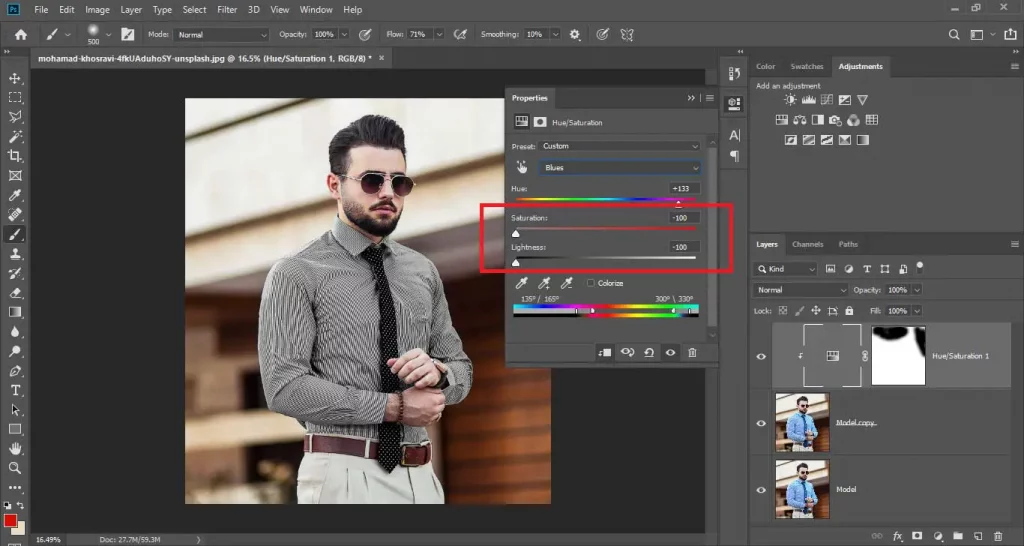
You can take the Saturation slider to -100 to get remove all the color from the object.
Now, you can slightly reduce the lightness to acquire an object that is black or slightly increase the lightness to get an object that is white. However, do it gradually because the effect won’t appear natural if you drastically raise or decrease the lightness.
Conclusion:
This is the way and main technique to change color of object in Photoshop in 5 simple and easy steps. Now you can change the color of object in just one minute by just using Photoshop.
Watch Video For More Info:

I’m a Graphic Designer with 5+ years of experience. Specialized in Adobe Photoshop.
Get Info About Any Photoshop Editing, Photoshop Manipulation, Logo Design, Flyers, Business Card, Cartoon Portrait and any type of work-related to Graphic Design and Photoshop Editing.


