
If you’re more familiar with Adobe Photoshop than other designing tools, you might find it easier to make a repeating pattern with PNG icons – ideal for highly personalized and eye-catching cover images, social media tiles, Zoom backgrounds, and more.
In this article, we’ll learn how to make a pattern in Photoshop using different icons.
There are many websites from which you can get icons to photoshop to make patterns of them but you can also get them from Photoshop by Noun Project Add-On. Best of all, with the Noun Project Add-On for Adobe, you can search and insert any icon from our huge library without having to leave your workflow.
Learn How To Make An Icon In Photoshop (Professional & Elegant) to make patterns.
Table of Contents
How to Use the Noun Project Add-On to Make a Repeating Pattern
The Noun Project Adobe Add-On is your new best friend when it comes to incorporating the Noun Project’s massive icon library of over 3 million icons into your workflow.
You may search our infinite database using this plugin, just like with our Mac app, and drag and drop icons right into your artboard. Install the Add-On when you launch Photoshop for the first time.
This extension starts with 100 free starter icons, but if you sign up for a NounPro account, you’ll be able to search for and download any royalty-free symbol you want, as well as customize the icon’s color, backdrop form and color, and even rotation before adding it to your artboard.
Create A New Document
To make a new document, download the Adobe Add-On, open Photoshop, and choose “Create New.”
It’s best to start with a square document with a resolution of 1,000 x 1,000 pixels.
If you’re going to print your artwork, make sure the document Color Mode is RGB online. If you’re going to print your artwork, make sure the document Color Mode is CMYK.
Select “Transparent” under “Background Contents.” While a repeating pattern with a solid backdrop color is possible, it’s ideal to keep your major elements (icons) separate from the background in case you need to alter each separately.
Select “Create” from the drop-down menu.
Begin with a 1000 x 1000 px document to create a square as your basic “pattern tile.”
Set the background contents to Transparent so that you can change the color of your background individually later.
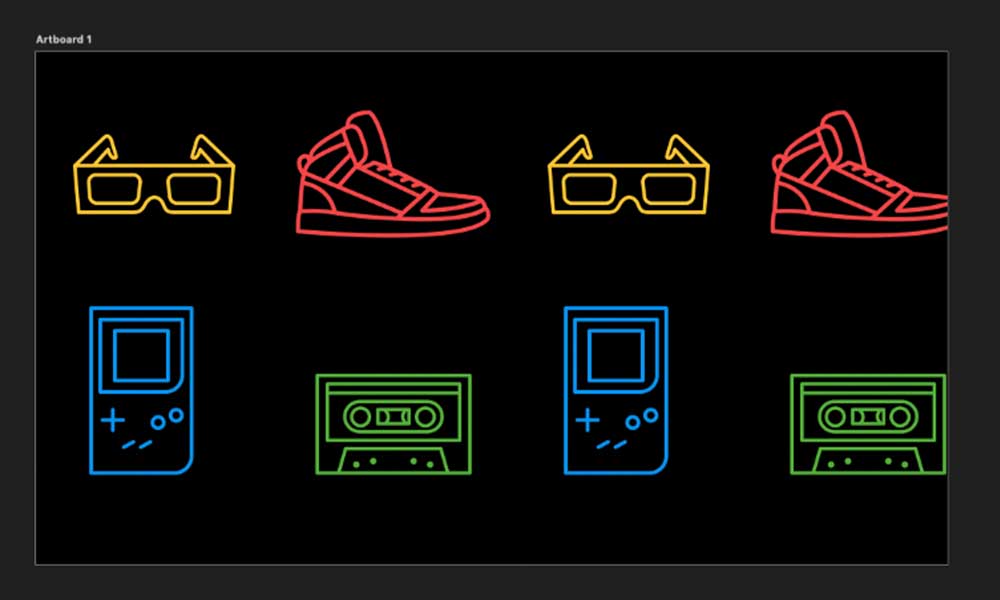
I’m going to start with a pattern that uses four icons in a square, so I’m going to use guides to divide my canvas into quadrants. To see Rulers, go to “View” and pick “Rulers” (or Command-R on a Mac). Then, with your cursor lingering inside the top and side rulers, click and drag to make a guide.
When you drag each guide over your canvas, it should instantly snap to the center point (500 pixels across, then 500 down). This creates four even quadrants on your canvas.
Go to View > Rulers to display rulers. Drag your cursor inside the top and left rulers to form guides, then snap each one to the document’s middle (at the 500-pixel point) to divide your artboard into four even quadrants.

Open Noun Project Extension.
Window > Extensions > Noun Project is where you’ll find the Noun Project Extension.
NounPro account and Sign in.
Sign in to your account if you’re a NounPro subscriber to get limitless royalty-free icon downloads and customization possibilities. You can also use any of the 100 icons provided in the free beginning pack if you aren’t yet a subscriber.
Get The Icons You Need For Pattern
Click “Enter” after you’ve found an icon you like. Click the black “download” arrow in the upper-right corner of an icon to instantly put it onto the canvas, or click the icon to discover customization choices, such as the proportions. PNG has been set to be.
I’m choosing a 1000-pixel-wide icon for this 1000×1000 canvas, understanding that I can resize it later.
To add icons to your artboard, search for them in the Noun Project add-on and click “Insert.”
You may also edit each icon by recoloring it or changing its size, rotation, and background color if you have a Noun Pro account.
Within the Noun Project Add-On, look for icons and click on the one you desire. A Noun Pro membership allows you to enter an unlimited number of icons while also allowing you to recolor and resize each one.

Select Any Color You Want.
You can choose a color from the drop-down menu, or click the grey “+” to pick your own or enter a HEX value.
Once you’ve chosen a color, it will be the default color for all new icons you find until you change it to black.
Get More Icons In Artboard
You can add as many more icons as you want to your artboard.
It’s a good idea to just look under each one for “More icons from this creator” so that you may use icons from the same collection and keep your visual style consistent (while establishing a theme).
Insert numerous Noun Project icons and, if desired, recolor each one.
They should be uniformly spaced in each corner of the artboard. Select icons from the same collections for visual consistency by looking through “additional icons by this author.”
You can recolor your icons as you place them in real-time. Select numerous icons from a collection by browsing “More icons by this designer” this provides aesthetic and thematic consistency.
Icon Positioning and Sizing
Click and drag your icons into new positions with the Move tool (“V”). You can also scale them up and down by grabbing a corner of their bounding box and clicking and dragging them in or out. By default, Photoshop will scale proportionally to ensure even resizing (hold down Shift while dragging if not).
When you move your cursor slightly beyond the bounding box corners, it will transform into a rotating arrow, which you may click and drag to spin the symbol clockwise or counterclockwise.
Scale and rotate each icon appropriately to your desired effect by using the corners of its enclosing box. To ensure uniformity, scale all of the contents together.
To resize an icon, click it and drag a corner of its bounding box in and out. If you move your cursor slightly past the corner, it will transform into a rotating arrow, allowing you to rotate the icon.
It’s recommended to pick all icons and scale them together to keep their visual weight consistent.

“Define” Your Pattern
Select each icon after you’ve set all of the pieces precisely how you want them (either by clicking and dragging over them on your artboard, or selecting all of them from your Layers panel).
Then select Edit > Define Pattern from the drop-down menu. This converts your pick into a repeating pattern, much like a solid color fill from your swatches. Give it a name and a pattern, then click OK.
Go to Edit > Define Pattern, give it a name, then click yes to turn the contents of your Photoshop artboard into a recurring pattern.
To turn the contents of your artboard into a pattern, go to Edit > Define Pattern. It will be saved as a pattern swatch if you give it a name.
So, where did it go?
Go to Patterns (by default, it’s on the right-hand viewer, but you may also go to Window > Patterns). A swatch tile of your pattern has been produced, as you can see.
Use the Pattern as a Fill to See it in Action
To experiment with your pattern, you may either utilize the same canvas or start a new project. Create a new Photoshop document that is 1920 px height by 1080 px wide if you want your final artwork to be an iOS wallpaper, or use the reverse measurements for a wide-screen banner appropriate as a cover photo.
Begin by creating a colored background in your new document. Select a color to begin with by going to Layer > New Fill Layer > Solid Color (or Gradient) (in this example, I want to test out my pattern against black). This will generate a new layer that spans the entire width of your artboard.
Then go to Layer > New Fill Layer > Pattern to make a layer for your pattern. “OK” should be selected. My custom pattern is the first one listed in my “Patterns” window in this case, therefore it has already filled the artboard.
Simply select your custom pattern in the Patterns window if yours defaults to a different preset pattern. Make sure the pattern layer is above the background layer in the layer hierarchy.
To begin, create a solid backdrop layer (Layer > New Fill Layer > Solid Color), which I made black in this example. Then select your pattern and create a pattern fill layer (Layer > New Fill Layer > Pattern). My repeating pattern is now visible in motion.
Pattern Options and Formatting
If you don’t see it, go to your Layers window and double-click the brick pattern icon that’s linked to your fill layer (if you don’t see it, go to your Layers window and double-click the brick pattern icon that’s linked to your fill layer). This is where you may choose the pattern’s scale (lower the percentage to zoom out and see more of your repeating pattern; raise it to see fewer and larger icons). For a more dynamic appearance, you can also change the angle.
To add some visual interest, I’ve reduced the scale of my pattern to 50% and increased the angle to 30%.
When you’ve got it where you want it, click “OK.”
Scale up or down, and modify the angle of the pattern in the Pattern Fill box.
You can alter the scale (or level of “zoom” into or out of your repeating pattern) and angle in the Pattern Fill dialogue box. Each one has been altered to make my pattern a little more lively.

Experiment with a Few Different Options
You may always fiddle with the colors on your solid background layer, or create a new Fill Layer to create a gradient backdrop instead of a solid color. You can choose from a collection of pre-made gradients or make your own with the sliders.
I’ve discovered a great sunset-colored gradient that I like, however, the colors don’t necessarily go with my pattern. What if I recolored the pattern itself instead?
I’ve made my backdrop a gradient and begun experimenting with the gradient editor, but now I’d like to change the color of my pattern’s icons instead.
Recoloring Your Pattern
While you may have a pattern with different-colored icons, Photoshop can instantaneously recolor the raster objects that make up your pattern.
Rather than having my gradient layer as a background, I’m going to drag it above my pattern layer, right-click it, and choose “Create Clipping Mask.” This instructs Photoshop to apply the colors (fill) of my sunset gradient just to the pixels of my pattern layer, resulting in a sleek gradient over my 80s symbol pattern.
In Photoshop, experiment with different colors or gradient fills to make your repeating pattern more interesting. To add a fill layer’s color to your pattern, drag it above your pattern layer and choose “Create Clipping Mask.”
When I drag my gradient layer above the pattern and click “Create Clipping Mask,” my gradient is applied to the pattern rather than the background. In the gradient editor, I may then alter the gradient to my liking.
Rather than using a preset, you could choose to edit your own gradient.
Within the layers panel, double-click your freshly created gradient layer (or go to Window > Gradient). Then, to enter the gradient editor, double-click the colored gradient bar.
You can create a custom gradient from scratch or use a preset as a starting point in this window. On the top, you’ll notice “Opacity Stops,” and on the bottom, you’ll see “Color Stops.” You can manually select a colour or enter its HEX value by double-clicking the color stops. The gradient can then be tweaked in the following ways:
Final Words | How to make pattern in Photoshop
This all method explains how to make a pattern in Photoshop using this Extension but you can make icons from any website like EndlessIcons or GraphicBurger.
Get the icons and make any patterns you want and if you want to make a pattern from any picture comment below. We’ll provide you with a brief article about it which will clear all your doubts.
Comment below if you have any queries and get notified about any new article by Subscribing to our NewsLetter.

I’m a Graphic Designer with 5+ years of experience. Specialized in Adobe Photoshop.
Get Info About Any Photoshop Editing, Photoshop Manipulation, Logo Design, Flyers, Business Card, Cartoon Portrait and any type of work-related to Graphic Design and Photoshop Editing.


