
Edges that are smooth In Photoshop editing services are quite important. After smoothing the edges, you’ll notice a significant difference in the image. By the way, if you’re looking for a tutorial on how to smooth edges in Photoshop, look no further.
I’ll demonstrate for you how to achieve a clean, sharp edge in any challenging background. A crisp edge is crucial for making composite images, product photographs, or magazine photography. Additionally, I’ll share some insider tips for preventing rough edges.
Background removal is an important technique for removing distracting and undesired background items. It also improves the image’s appeal. Various strategies must be used depending on the complexity of the background.
Unfortunately, no single strategy can provide the best results. To make the selection process more efficient, use two or three techniques at a time. When trimming photos, you’re bound to run into issues with the edges. Furthermore, cut-out photos have ragged borders in the limbs, hair, and leg areas.
Related: Learn to Cut Out an Image in Photoshop In Simple Steps.
Table of Contents
What is Smooth Edge? Why We Need it and What Tools are The Best
It is critical to make the cutting edges smooth while cutting off images from the background. Unprofessional clipping services, on the other hand, will trim your essential exterior margins incorrectly. As a result, your subject has jagged edges that may cause the audience to become distracted.
Smooth Edges Photoshop
Smooth edges are created by removing all of the rough and jagged edges from cut-out and low-quality photos. Soften the pixel in the centre of the border and backdrop. As a result, the edge will be smooth.
E-commerce, digital photography, advertisements, and publications all rely on the internet in this digital age. They require a high-resolution product photo or portrait image that is free of rough edges. The perfect image is crucial to their company’s success. It is hard to win a race in this competitive business environment with low-quality photographs.
When you take pictures with a low-quality camera, the edges can be harsh. Furthermore, cutting out the distracting background to make the image more appealing can result in jagged edges. Unfortunately, photographs with rough edges are of poor quality.
So, smooth off the rough edges to make it more appealing. It is critical for the advancement of your company. Among all the tools available, Photoshop is the best at smoothing out rough edges. It allows for flexibility, depth control, and suitable selection in order to make the edge as well as the skin smooth.
To create smooth edges in Photoshop, we use the tools listed below.
- Refine Edge brush
- Burn Tool
- Dodge tool
- Gaussian Blur
- Level
Why Smooth Edges are Essential
Photoshop is the most popular photo altering software. This massive software has miraculous retouching features for making your digital shot more appealing. It has a plethora of tools that can help you fix your image difficulties.
Furthermore, if you cut out images or take shots with low-quality cameras, the edges will be jagged. As a result, your photograph will appear unattractive, and the shot will be a waste of time. You can use Photoshop to smooth rough edges and make your shot more appealing. However, it will improve the naturalness and attraction of your image.
How to Get Smooth Edges Photoshop
I present an excellent channel pull technique with avoiding, burning, and edge refining to make your cut-out beautiful. To make a mask, we’ll employ a powerful dodge and burn technique. You’ll be relieved to learn that this channel pull technique is compatible with all versions of Photoshop.
Make Selection
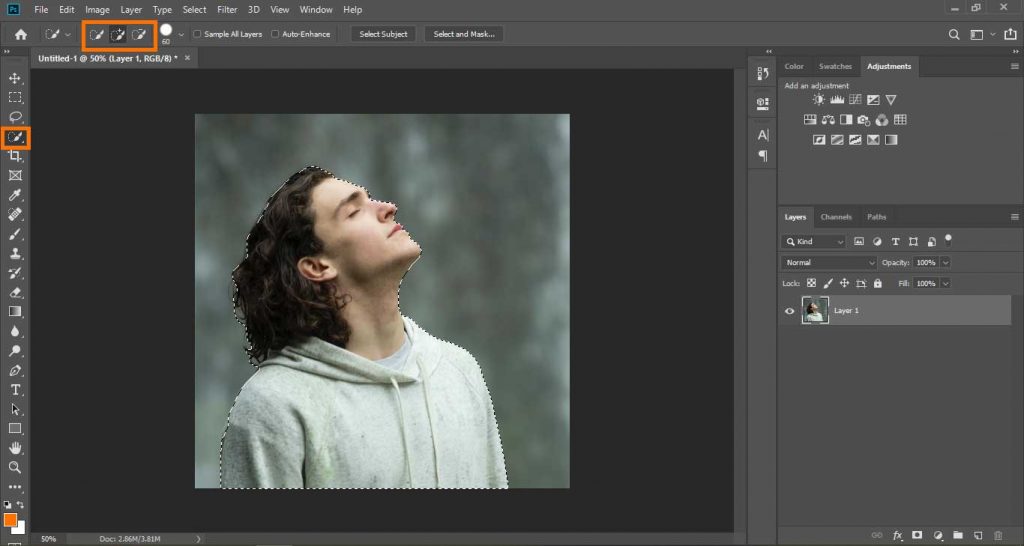
To begin, choose a subject from the image. Select the subject with the Quick Selection tool from the left toolbar.
Select Channels Panel
Now, glance to the bottom right of the screen and select the channel. Then a new window will appear, displaying the colour-contrasting percentage of your photographs.
Now choose the channel with the highest contrast colour. We chose the blue channel for our sample images since it is blue.
Create a new Channel
Keep your cursor on the Blue channel and drag it to the new channel symbol at the bottom of Photoshop. It has a “+” symbol on it. It aids in the creation of a new copy channel for the development of our tricks.
Contract Selection
Then Select-Modify-Contract from the top Options bar then enters 12-16 pixels.
Finally, press the OK button.
As a result, your pick will be centred within the image.
Fill Selection
Fill the selection with black hues. You can change the Foreground colour straight from the Toolbar, or you can enter D to change the colour quickly. Enter Alt/Option Delete to fill the foreground colour.
Expand Selection
Select-Modify-set expands by 20-35 pixels depending on your image resolution from the option bar.
Inverse Selection
Now it’s time to reverse the order of the choices. It’s a straightforward task. Press Cmd/Ctrl + Shift + I.
Are you astounded by the incredible inverted selection? It aids in the accuracy of your cut-out image.
Replace Fill Color
Change the colour of the fill to white. Simply hold down Ctrl/Cmd and delete. It will change the colour of the foreground.
Then select the inverse selection and deselect it. Press D + Ctrl/Cmd.
Change the Foreground Color
Now that the cut-out is complete, zoom in on the photo while keeping an eye on the edges. It does, however, have a thin edge that has to be corrected.
Watching The Edges
To make it crisp and smooth, follow the steps below.
How to Detect Edges
To create smooth edges, first, identify the rough edges. If your image has undulations and a hair or fur edge, as well as background lighting, you can use edge detection to discover the rough edge.
The Radius slider and Smart Radius checkbox can be found in the Edge Detection panel. You should start with a low setting to regulate your output. Then slowly increase it. You should also leave the smart Radius unchecked.
If the detection results aren’t satisfactory, you should increase the Radius pixel. Check the work edges once more to see if it can detect all of the activated edges. I believe a 5-pixel can provide perfect edge detection in the case of hair. As a result, this value may vary depending on the complexity of your image.
Use Refine Edges Brush Tool
This type of edge is difficult to make smooth if your image has hair or fur. I employ a variety of techniques, but none of them satisfies me with the end product. After a few attempts, I’ve discovered that the Refined Edge Brush is a wonderful tool for smoothing complicated hairy edges.
Any flyaway hair, fur, or fuzzy hair edges will be miraculously smoothed with this tool. Select the 2nd Refine edge brush from the left toolbar by clicking on the brush.
The important or rough edges have already been marked. To obtain a better perspective of your rough edge, zoom in on the shot. By pressing an open or close bracket, you can modify the size of the refine brush tool. It is preferable, to begin with, a tiny brush. Move your mouse pointer over the fur’s edges now. Then start painting with your mouse on a small section of hair. It will instantly make that hair area smoother.
To correct the rough edge, slowly move the mouse pointer over it and drag it. The entire rugged, sloppy, or rough edges will be replaced with new smooth, clear, and crisp edges. You must be impressed with the hair edges’ fineness. Take a look at the photographs below to see how we applied the refining brush edge. You may also study it with a 400% zoom-in mode. However, there will be no extra light or rugged hair.
In the case of hair, fur, or other complex challenges in the subject, this procedure produces the greatest results.
Use the Burn Tool
Select Burn Tool from the left toolbar and tick the top Options bar. Change the Shadows & Exposure drop-down to 15% from the Range drop-down.
To see the rough edges clearly, hold down Alt and zoom in on the shot. Then start painting over the jagged edge with your mouse. Then take note of the changes that occur. It does a fantastic job of smoothing out the edges. Simply look at the photographs below to get a sense of the changes.
Use Dodge Tool
Apply Dodging after smoothing with the burn tool.
Now select Burn Tool from the toolbar. The images can be magnified. Find out what the dark side is now. Then go to highlights and drag the cursor over the edge to lighten it. To make the edges softer and more realistic, use the burn tool to paint gradually.
To obtain the greatest results, use both the Burn and Dodge tools while correcting hair edges.
Let’s say you’re not thrilled with the edges and want to smooth them out. Then use the two approaches listed below. If your edge concerns have already been resolved, you can skip this step.
Apply Gaussian Blur
The Gaussian blur can also be used to smooth off jagged edges. Pay attention to the instructions.
- Choose Filter- Blur- Gaussian blur.
It will instantly smooth your jagged edges. If your image has a bumpy edge, choose a blur radius that is large. You can adjust the radius slider to make it bigger or smaller. To achieve the best results, use the visual display to choose the proper radius.

Use Level
Smoothing down your rough edges with level adjustments is a great way to go. To alter the level, use the commands listed below.
- Choose Image- Adjustments – Levels.
You should now see a new window with three sliding arrows. The right arrow will help you make your image white, the left arrow will help you make it thin, and the middle arrow will help you make a mix of both. The result can also be viewed in the visual display. Slide the arrow slowly and examine the edges to find the appropriate level for a smooth edge.

Lead Selection
It’s now your turn to lead the choosing process. Execute the command listed below.
- Press Cmd/Ctrl + Click on the Channel. Thus, it will select the white areas on the images.
Now from the channel panel, select RGB. As a result, you will get the main channel back.
Masking
Masking is now required. To make a new layer mask, use the command below.
Press the new layer mask button from the right bottom side while holding down Alt/Option.
Take a look at the photographs below. You’re using Photoshop to create neat and clean cut-out images with smooth edges.
Related: The Ultimate Guide About Layer Masks In Photoshop (All Functions).
FAQs on How to Smooth Edges in Photoshop
Is there a smooth tool in Photoshop?
Photoshop is the most popular photo altering software. It comes with a variety of smooth tools for repairing your rough edge. Making precise smooth edges is convenient and adaptable.
A smooth brush tool, a burn tool, a dodge tool, a Gaussian blur, and more tools are available. To get the greatest outcome, combine two or three tools.
How do I smooth the edges of text in Photoshop?
Text fuzziness is common in low-resolution photos. To smooth the text borders, follow the steps below.
To begin, select your text and press Ctrl+ T. You’ll also see a Character display pop-up.
This window has anti-aliasing options for smoothing the edges. Select the smooth edge option from the drop-down menu.
How do you fade edges in Photoshop?
Using Photoshop, you can easily fade the edges. You can do so by following the steps below.
1. Make a selection near your desired edge using any preferred selection method.
2. Now select Select- Modify-Feather from the top choices bar.
3. In the new box that appears, type 25 in the Feather Radius field and then click OK.
4. Next, go to Image-Adjustments-Curves. Choose the curve’s centre point and place the anchor point there. After that, slide it around to fade your edges.
What is the best tool to do smooth edges?
The greatest tool for making clean borders is Adobe Photoshop. Because it provides for depth control and a hand-drawn route, it aids in the exact correction of rough edges. Furthermore, the many useful smooth tools make it simple to smooth off rough edges and improve the image’s appeal.
Who needs smooth edges?
For the online marketer, smooth edges are a must. Simultaneously, in this digital age, the majority of people require a smooth edge in order to expand their businesses. Smooth edges are demanded by photographers, e-commerce entrepreneurs, advertisers, periodicals, and celebrities.
It assists them in attracting their intended audience. Soft edge creates visually appealing photos that can help you increase visitors to your website.
Final Words | How to Smooth Edges in Photoshop
I hope that this information will help you with your selection process. You can now create smooth edges in Photoshop with ease. To produce a sharp edge without a jaggier and ragged edge, follow all of the stages.
It takes a long time to make clean edges and cut out images perfectly. That necessitates commitment and focus. If you don’t have time, you should hire an image masking or clipping path expert.
Rugged edges of your cut-out image can leave a negative impression on viewers and clients. As a result, it’s critical to smooth the edge in order to draw in the viewers.

I’m a Graphic Designer with 5+ years of experience. Specialized in Adobe Photoshop.
Get Info About Any Photoshop Editing, Photoshop Manipulation, Logo Design, Flyers, Business Card, Cartoon Portrait and any type of work-related to Graphic Design and Photoshop Editing.


