
Doing selections in Adobe Photoshop is a crucial part of editing. As if we have to remove any background or take any object from any picture or anything you want to do you should make a selection of it. We have different tools for selection in Photoshop and one of them is the Quick Selection Tool. So, in this article, we’ll learn how to use the Photoshop Quick Selection tool to make selections in Photoshop.
The Quick Selection tool is a useful and also entertaining Photoshop feature to learn. When you have the perfect subject but want to try out a new background, then you should use Photoshop Quick Selection Tool. It’s also useful for changing an area of your image selectively.
Table of Contents
Photoshop Quick Selection Tool
The Quick Selection tool is one of Photoshop’s many selection tools. Photoshop recognizes and chooses the edges when you select an area, so you don’t have to trace them manually.
This tool works best with photographs that have a lot of contrast and well-defined edges.
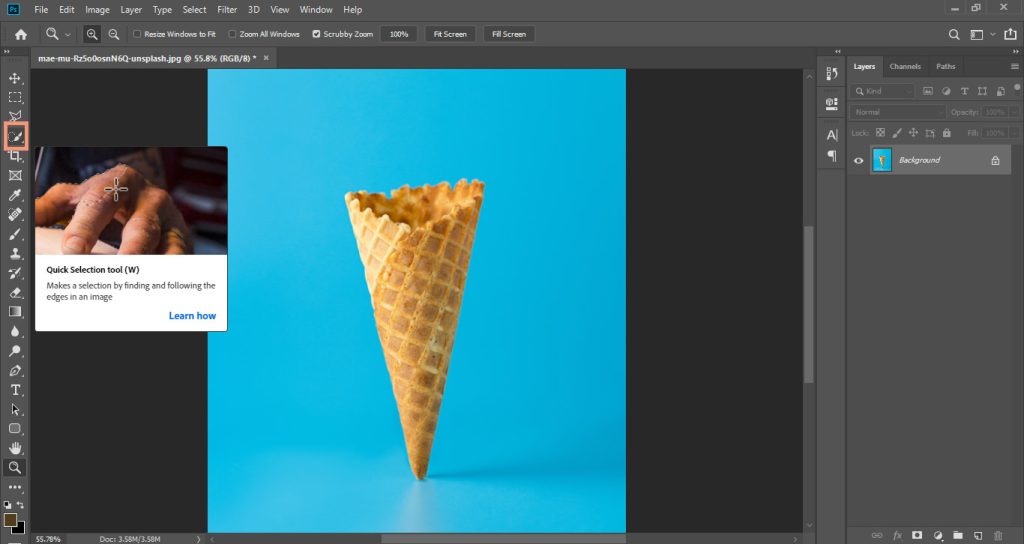
Where is the Photoshop Quick Selection Tool?
It’s in the toolbar on the left side of your screen. Below the Polygonal Lasso Tool, it should be the fourth option. A paintbrush with dotted lines around the tip should be the rapid selection icon.
If you right-click on the icon, you’ll see the object selection tool and the magic wand in addition to the quick selection tool. They all function in the same way, although with varying degrees of precision depending on the subject.
The rapid selection tool is ideal for selecting an irregularly shaped object in a photo. In the meanwhile, the object selection tool works best for objects that have a consistent shape. Finally, you’ll need to use the magic wand tool for objects with a lot of nooks and crannies.
How to Use Quick Selection Tool in Photoshop?
Let’s go over all of the processes for using the rapid selection tool to select objects.
Keep in mind that the quick selection tool doesn’t always result in a perfect cut. So, for better outcomes, we’ll also show you how to clean your selection and make it more accurate.
Selecting Subject with Photoshop Quick Selection Tool
As previously discussed, there are a few distinct Photoshop selection tools. But there’s a reason this one is named ‘quick.’
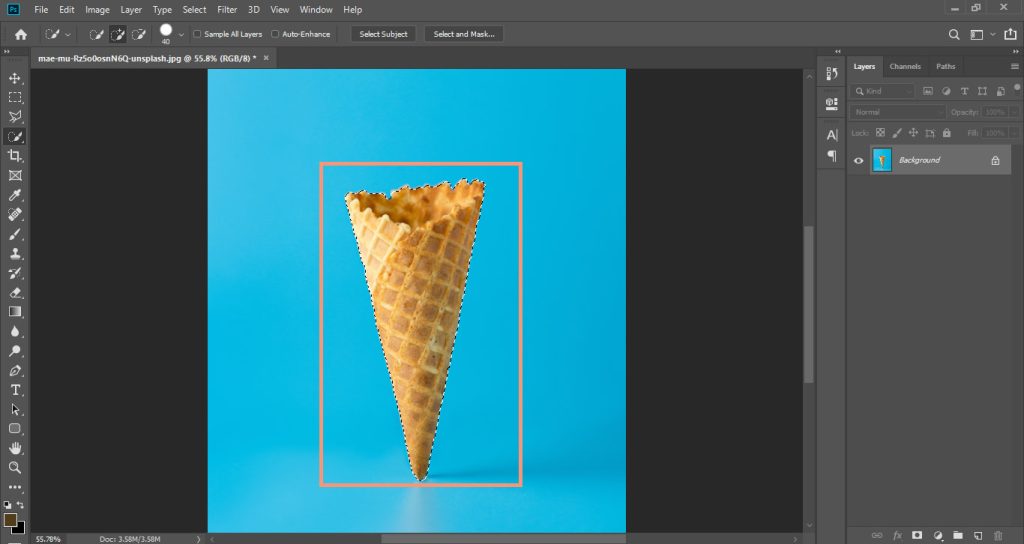
Drag the cursor over a part of the area you wish to select with the Quick Selection tool and left click with your mouse button.
Around the shape, a line of ‘ marching ants ‘ will appear. Continue to move the cursor within the area to add to the mix. It’s okay if things are difficult at first.
To deselect huge sections, hold down the Alt (Windows) or Option (Mac) key while dragging the cursor over the region you want to deselect that.
The marching ants will disappear from that location.
Making a Backup to Work Non-Destructively
To avoid permanently erasing your selection, it’s best to operate using layers and layer masks.
Related: Learn all about Layer Masks Quick and Easy.
That is, you can hide elements of your image and then show them at any point using the brush tool.
Duplicating a Layer
In the Layer menu in the lower right of your screen, unlock the Layer. Duplicate Layer can be done by right-clicking on it and selecting Duplicate Layer. You’ll notice that another layer has appeared.

To hide it, click the eye icon on the bottom Layer (this hidden lower Layer is a backup in case of Photoshop disasters).
Revealing Your Selection
Click Layer > Layer Mask > Reveal Selection at the top of your screen.

Finally, your background fades away to reveal the rough cut-out shape you’ve chosen.

Refining Your Selection In Photoshop
1. Refine Your Selection with Select and Mask
Now you’re probably wondering, “How to improve the accuracy of the rapid selection tool?”
I use the Select and Mask tool to clean up my photos at this point in the process. Select the layer mask (the black and white shape outline box) from the layer menu.
At the top of your screen, select Select and Mask. If the button isn’t visible, make sure you’ve first clicked the Quick Selection tool button.

Adjust the tool’s size, hardness, and spacing. Then drag your cursor over the image’s edges slowly.
Depending on what I’m selecting, my Select and Mask tool settings alter. That’s why a little trial and error is required.
For fluffy borders or hair, I use the Select and Mask tool. For more difficult lines, I use the Brush tool (more about that shortly).
Related: Click and Check out this article and Master refining edges and making them smooth.
About Backgrounds
If you don’t have a background prepared, you won’t be able to use the Quick Selection tool successfully. It’s sometimes enough to simply create a neutral background in Photoshop.
It would be ideal if your background lighting matched the option. That way, it wouldn’t appear to be a hoax.
If your choice has cool lighting, you’ll want to find a background that has the same color temperature.
Furthermore, the direction of the light should be considered. If it’s coming from the left, your backdrop lighting should be coming from the same way as well.
Finally, your image’s camera angle should correspond to your choice.
If your selection was photographed at eye level, you can’t use a background shot at a 45-degree angle. People can be fooled by even minor differences in perspective and immediately recognize that the image is fake.
Check that the layers on the lower right of your screen are in the correct sequence to ensure that Photoshop displays both the backdrop and your selection. Your selection and layer mask should be on top of your background.
Click on one of the layers and drag it up or down to shift it around.
Adjusting the Background
Make edits to the subject and background photographs if they appear mismatched or uneven. Start with one of the photographs’ temperatures and brightness.
Changing the saturation and brightness of individual colors can sometimes help. Try turning both photos to black and white if the images still don’t match. However, ensure that the contrast, clarity, and shadows are all consistent.
When you convert your image to black and white, you can work with different degrees of grey and black. It would be easier to match your choices to the background if you removed the color.
Click to learn more about matching the subject with a backdrop in a natural way in Photoshop.
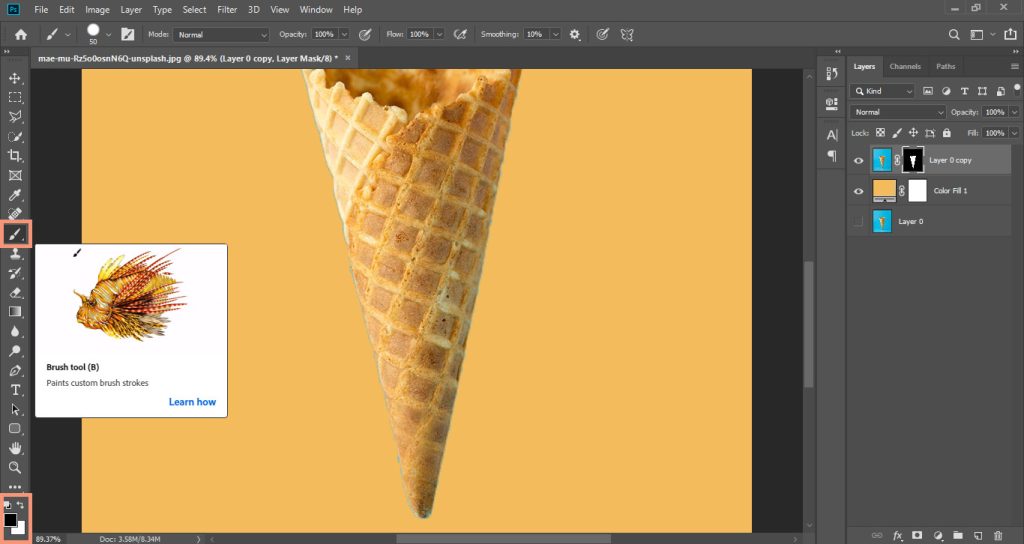
2. Refining Your Selection Using Brush Tool Photoshop
It’s rare that I utilize the Quick Selection tool without also employing the Brush tool.
Check to see if any edges need to be cleaned up once your pick has been placed in their new setting.
On the layer menu, select the layer mask, then the Brush tool. Zoom in (ALT+, CMD+) and thoroughly inspect the entire perimeter of your selection.
Brush the cursor over the sections you want to reveal or hide with care.
Alternate between hiding and displaying areas of the photo by switching between the ‘Foreground and Background Colors’.
Use Selection Tool on Photoshop to Make Local Adjustments
Of course, Photoshop‘s selection tool isn’t simply for removing things from photographs. It can also be used to isolate items so that changes can be made in certain sections.
All you have to do now is open an Adjustment Layer after you’ve selected the topic in your photo.
You can choose the characteristics you want to alter in the Adjustment Layer to fix your selection. White Balance, Hue/Saturation, and Brightness/Contrast are all possibilities.
Remember that if you only need to make minor changes to your selection, you don’t need to clip it out at all.
Photoshop converts your selection to a layer mask as soon as you select an adjustment layer. That way, any changes you make will only affect that specific region.
You’ll see your selection dim or brighten when you modify the Brightness slider if you choose Brightness/Contrast. However, anything outside of that selection will remain unchanged.
What if your selection is fine, but the remainder of the shot requires some tweaking? Then right-click and select Select inverted from the menu. Photoshop will then apply your modifications to the rest of the image, but not to the selected area.
Conclusion | Photoshop Quick Selection Tool
We’ve learned now how to use the Quick Selection Tool to make Selections in Photoshop and also refine them to make them look real.
The Quick Selection tool has also helped me enhance my overall Photoshop skills and my attention to detail.
Making mistakes when practicing Photoshop techniques is the best way to learn them. Select any pictures with less-than-ideal backgrounds from your photo archives, then use Photoshop’s Quick Selection Tool to correct it.

I’m a Graphic Designer with 5+ years of experience. Specialized in Adobe Photoshop.
Get Info About Any Photoshop Editing, Photoshop Manipulation, Logo Design, Flyers, Business Card, Cartoon Portrait and any type of work-related to Graphic Design and Photoshop Editing.


