
Wanna know how to remove a double chin in Photoshop? This must happen with us in two conditions which are let you take a picture of yourself or any other model to use it on your graphic or other purposes, you took the picture from the wrong angle and it shows the double chin of the model and the second condition is you have to work for a client and he/she asked you to remove double chin from the picture.
In short, you have pictures of a person having a double chip and you have to remove the double chin of that person in the picture.
Here are two ways to fix this issue. The first is to take a new photo from a perspective in which your double chin is less obvious. If this situation does not apply to you, Photoshop can be used to fix the issue.
Photoshop is the most variant software for picture editing and is the ideal software for this use and another photo editing.
So, here I’ll show you to remove the double chin of a person in Photoshop in some simple steps with pictures.
Let’s Go For It!
Table of Contents
Step 1: Opening Picture In Photoshop
Obviously, the first step is to open the portrait image from which you have to remove the double chip in Photoshop.
You can easily select from File > Open.
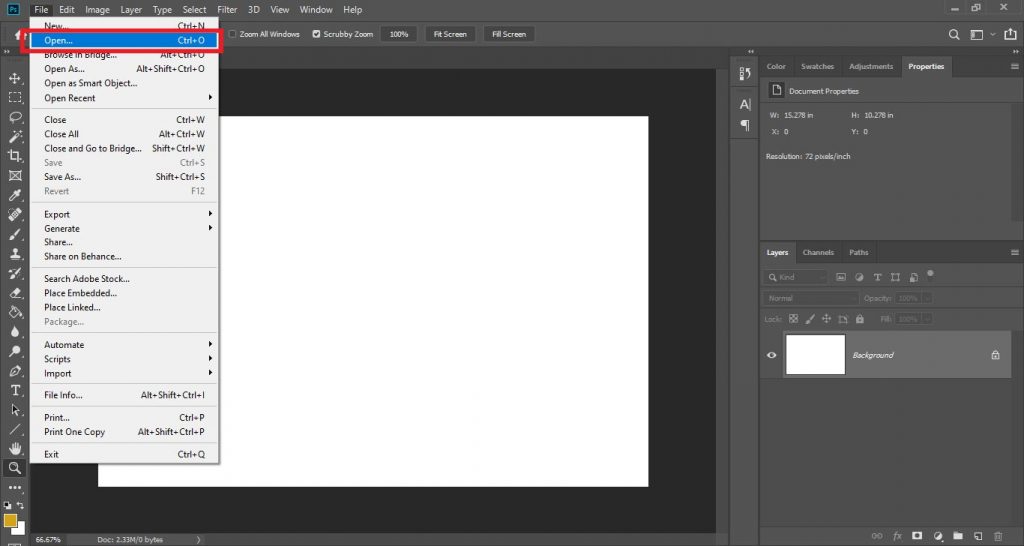
Or you can simply drag and drop the image in Photoshop to open it.
Step 2: Duplicating Picture In Photoshop
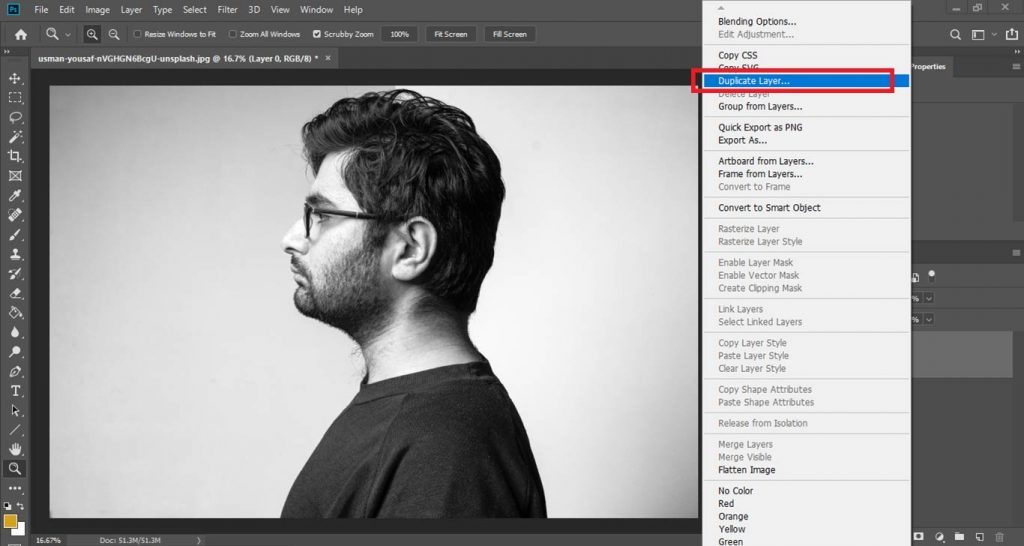
Now after you’ve got the photo open in Photoshop, the next step is to make copies of the layer to make sure that any changes that you make won’t affect the original image and we have the original image as a backup.
For this right-click the image layer and select Duplicate Layer.
You can also press Ctrl + J for PC and Command + J on MAC.
Step 3: Opening Liquify Tool In Photoshop
The tool you have to use is the Liquify Tool to remove the double chin in your image.
You can open Liquify Tool by simply going to the top of the screen and clicking Filter > Liquify.
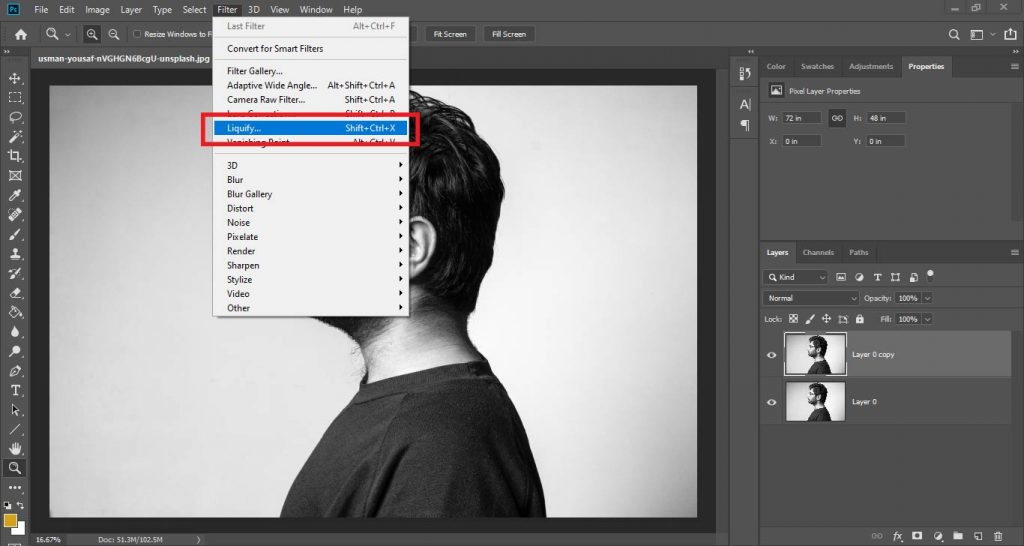
You can also press Shift + Ctrl + X for Windows or Shift + Cmd + X for MAC.
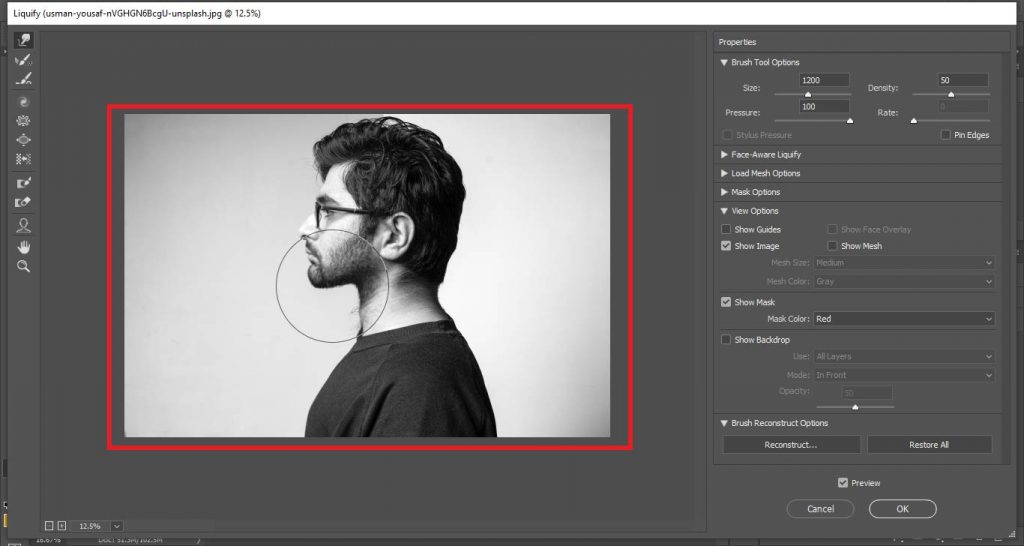
Step 4: Selecting the Forward Warp Tool In Photoshop
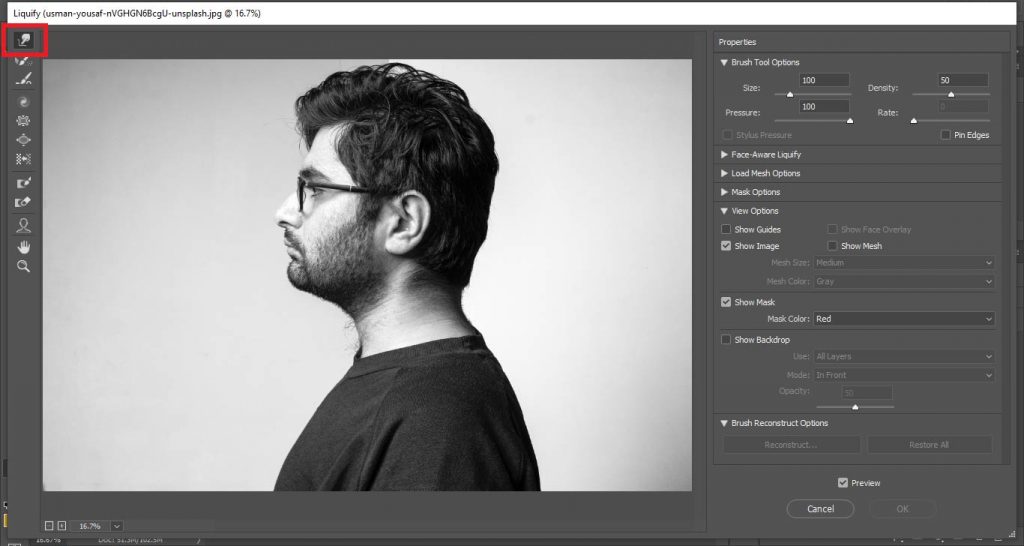
Now in Liquify Tool Panel, you have to select the Forward Warp Tool. This can be done by clicking on the icon from the top of the list at the left of the window, or by hitting the shortcut key W.
This tool is the best for editing facial features, making it ideal for removing a double chin.
Step 5: Using the Forward Warp Tool In Photoshop
This tool is ideal for moving the features from one place to another but we have to do it carefully so that it does not look fake.
Now we have to remove the double chin through this tool. Go ahead and start clicking and dragging with your mouse over the areas that you want to edit.
You have to drag the double chip to your mouth in such a way that the double chip hides. You have to play around with this, and it will become easier to use as you get the hang of how the tool works.
Make sure to not take the edits too far and make sure to keep it real, not fake.
ADDITIONAL STEPS
Now we have our double chin almost removed but to make it more realistic we have to add some additional touches to the image. We can move on to adding noise to the photo to give it some subtle texture.
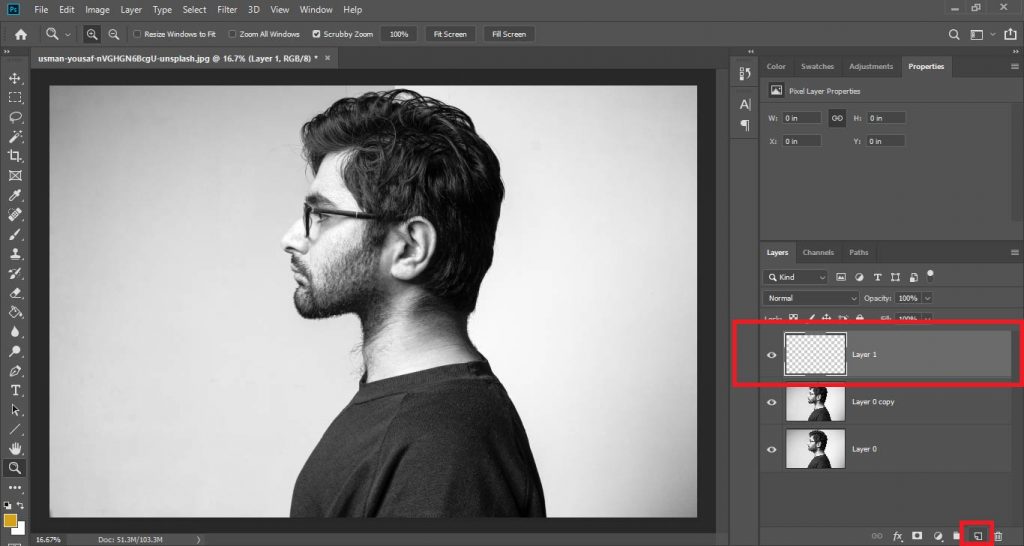
Step 6: Creating a New Layer In Photoshop
Now create a new layer to add noise by clicking on the icon second from the right at the bottom of the layers window
You can also press Shift + Ctrl + N for Windows or Shift + Cmd + N for MAC.
Fill this layer gray by going to Edit > Fill.
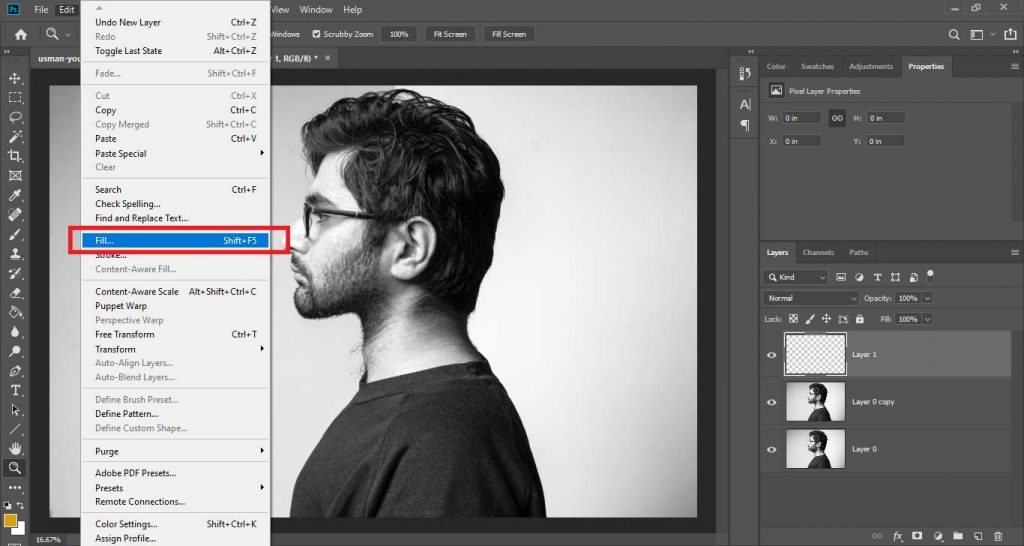
Clicking on this will cause a new window to pop up, in which you can edit the Fill settings.

Step 7: Adding Noise To Layer In Photoshop
Now that we’ve got the new gray layer set up, the next step is to add noise to the layer.
Now you have to go to Filter > Noise > Add Noise.
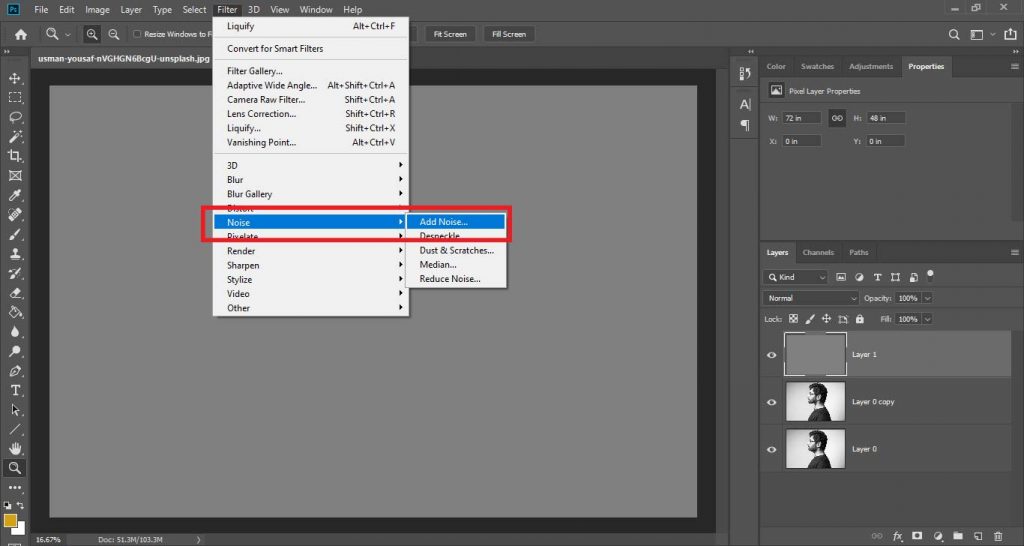
A new window will open, where you can set the intensity of the noise. I set this to about 4%, however, this value may change depending on your image, notably the size of it. Play around with this until you achieve a good effect.
Step 8: Blurring the Noise In Photoshop
Now we have a harsh noise in our new layer we have to make it less sharp by adding some blur to it.
To do so go to Filter > Blur > Gaussian Blur.
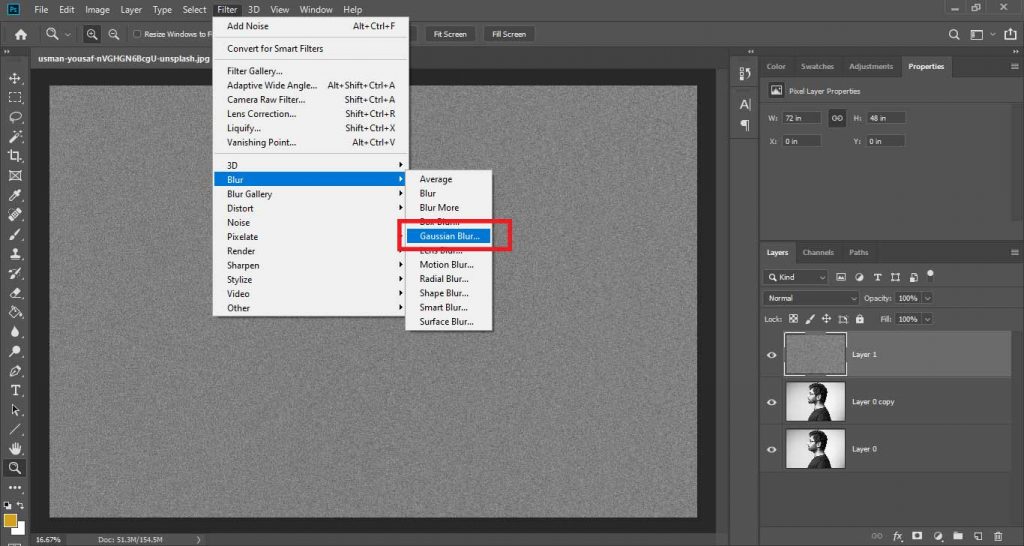
Doing so will cause a new window to appear, in which you can choose a value to set as the radius of the blur.
The appropriate value will again vary depending on the size of your image.
The larger the radius, the more blurry the layer will become. And the blurrier the layer, the less prominent the effect will be. Feel free to experiment with this setting until you are left with an appearance that you’re happy with.
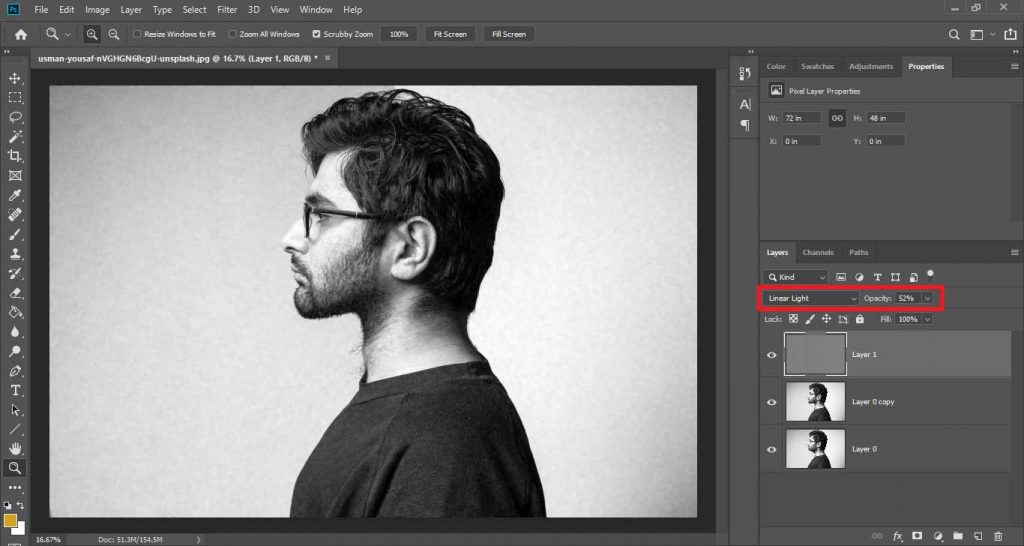
Step 9: Changing Blend Mode Of Noise In Photoshop
Finally, we have to change the blend mode of the noise layer to Linear Light, to make the noise mimic the texture that you want on your photo.
And also reduce the opacity to something 30% to 40% to make it realistic.
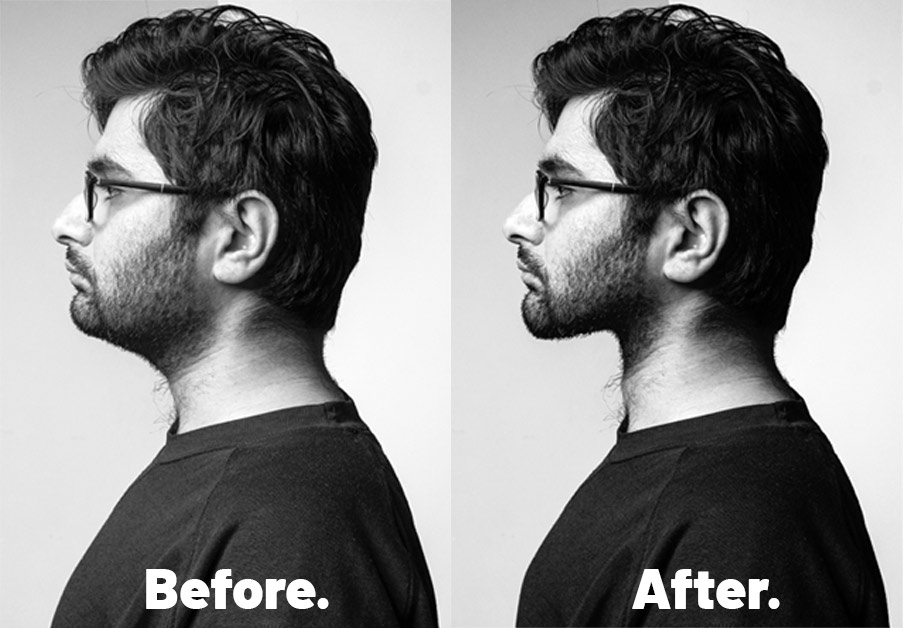
This is how to remove double chin in Photoshop!
Related: Learn To Save Hight Quality Jpegs After Editing The Picture!
Watch Video For More Deep Tutorial:

I’m a Graphic Designer with 5+ years of experience. Specialized in Adobe Photoshop.
Get Info About Any Photoshop Editing, Photoshop Manipulation, Logo Design, Flyers, Business Card, Cartoon Portrait and any type of work-related to Graphic Design and Photoshop Editing.


